Screen Printing at Home: DIY step by step Photo-emulsion
The first part of the tutorial is available here.
I’ll be uploading more tutorials and blog content soon.
Want to be updated as soon as new content goes live?
Screen printing with photo emulsion is considered a more advanced printmaking technique. Before getting into it, it’s worth understanding a bit about screen printing and the kinds of things that can be created and printed using this method. That said, it’s a process that can be learned and practiced independently, as I’ll show in this post.
If you remember, in the previous blog post I started by printing on a tote bag using a stencil screen-printing technique. In this post, to demonstrate screen printing with photo emulsion, I’ll continue printing an additional layer on the same bag.
Let’s get started:
1. Prepare and gather all the tools and materials
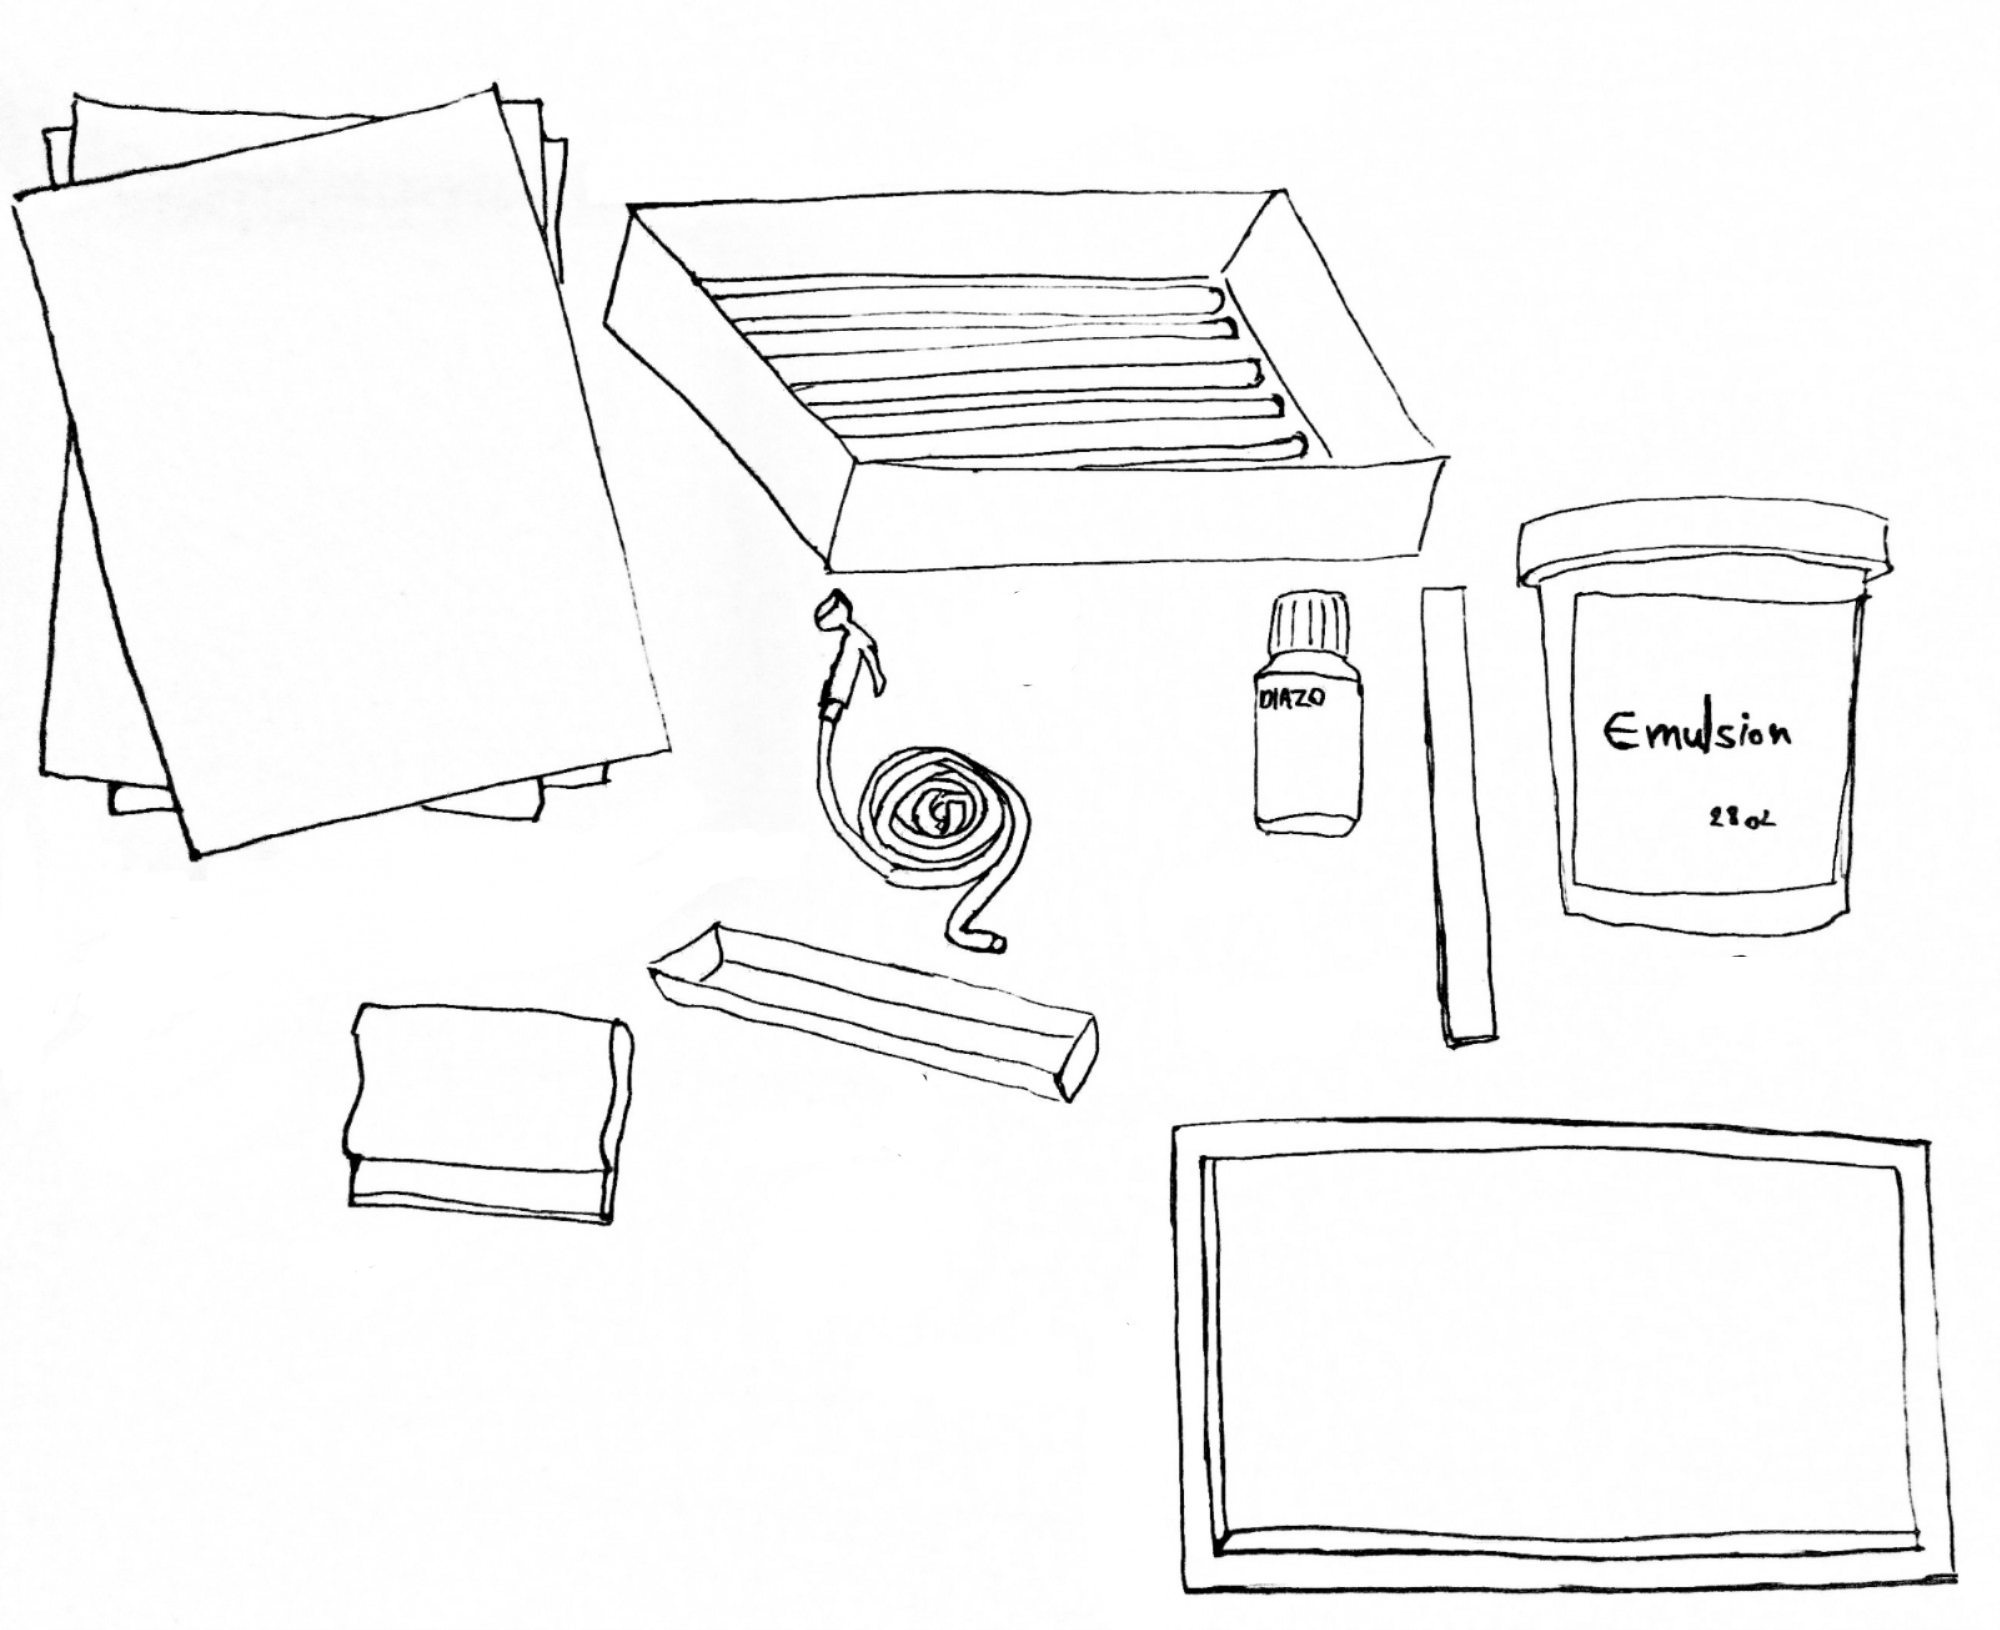
So yes, you’ll need some professional tools and materials as well.
The easiest items to get are transparency sheets compatible with your printer. You can find them in office supply stores (note that there’s a difference between transparencies for inkjet printers and those for laser printers. A standard home printer is usually an inkjet printer). A hose and spray nozzle are also easy to find at hardware stores or garden centers — or you may already have them at home, which works perfectly for our purposes.
Now for the screen-printing specific equipment: screens, inks, emulsion, emulsion remover, and squeegees can be purchased through my website as individual supplies or as part of a home kit. Emulsion, a scoop coater, as well as screens and squeegees, can also be bought from various suppliers.
A light table / exposure unit usually needs to be built yourself. Buying one is quite expensive, and second-hand options are hard to find. When we get to the light table stage, I’ll include links explaining how to build one.
Besides what I mentioned and what appears in the illustration above, you’ll also need a computer and a home printer — but I’m pretty sure you already have those :)
2. Prepare the emulsion
There are two types of emulsion:
Ready-to-use emulsion
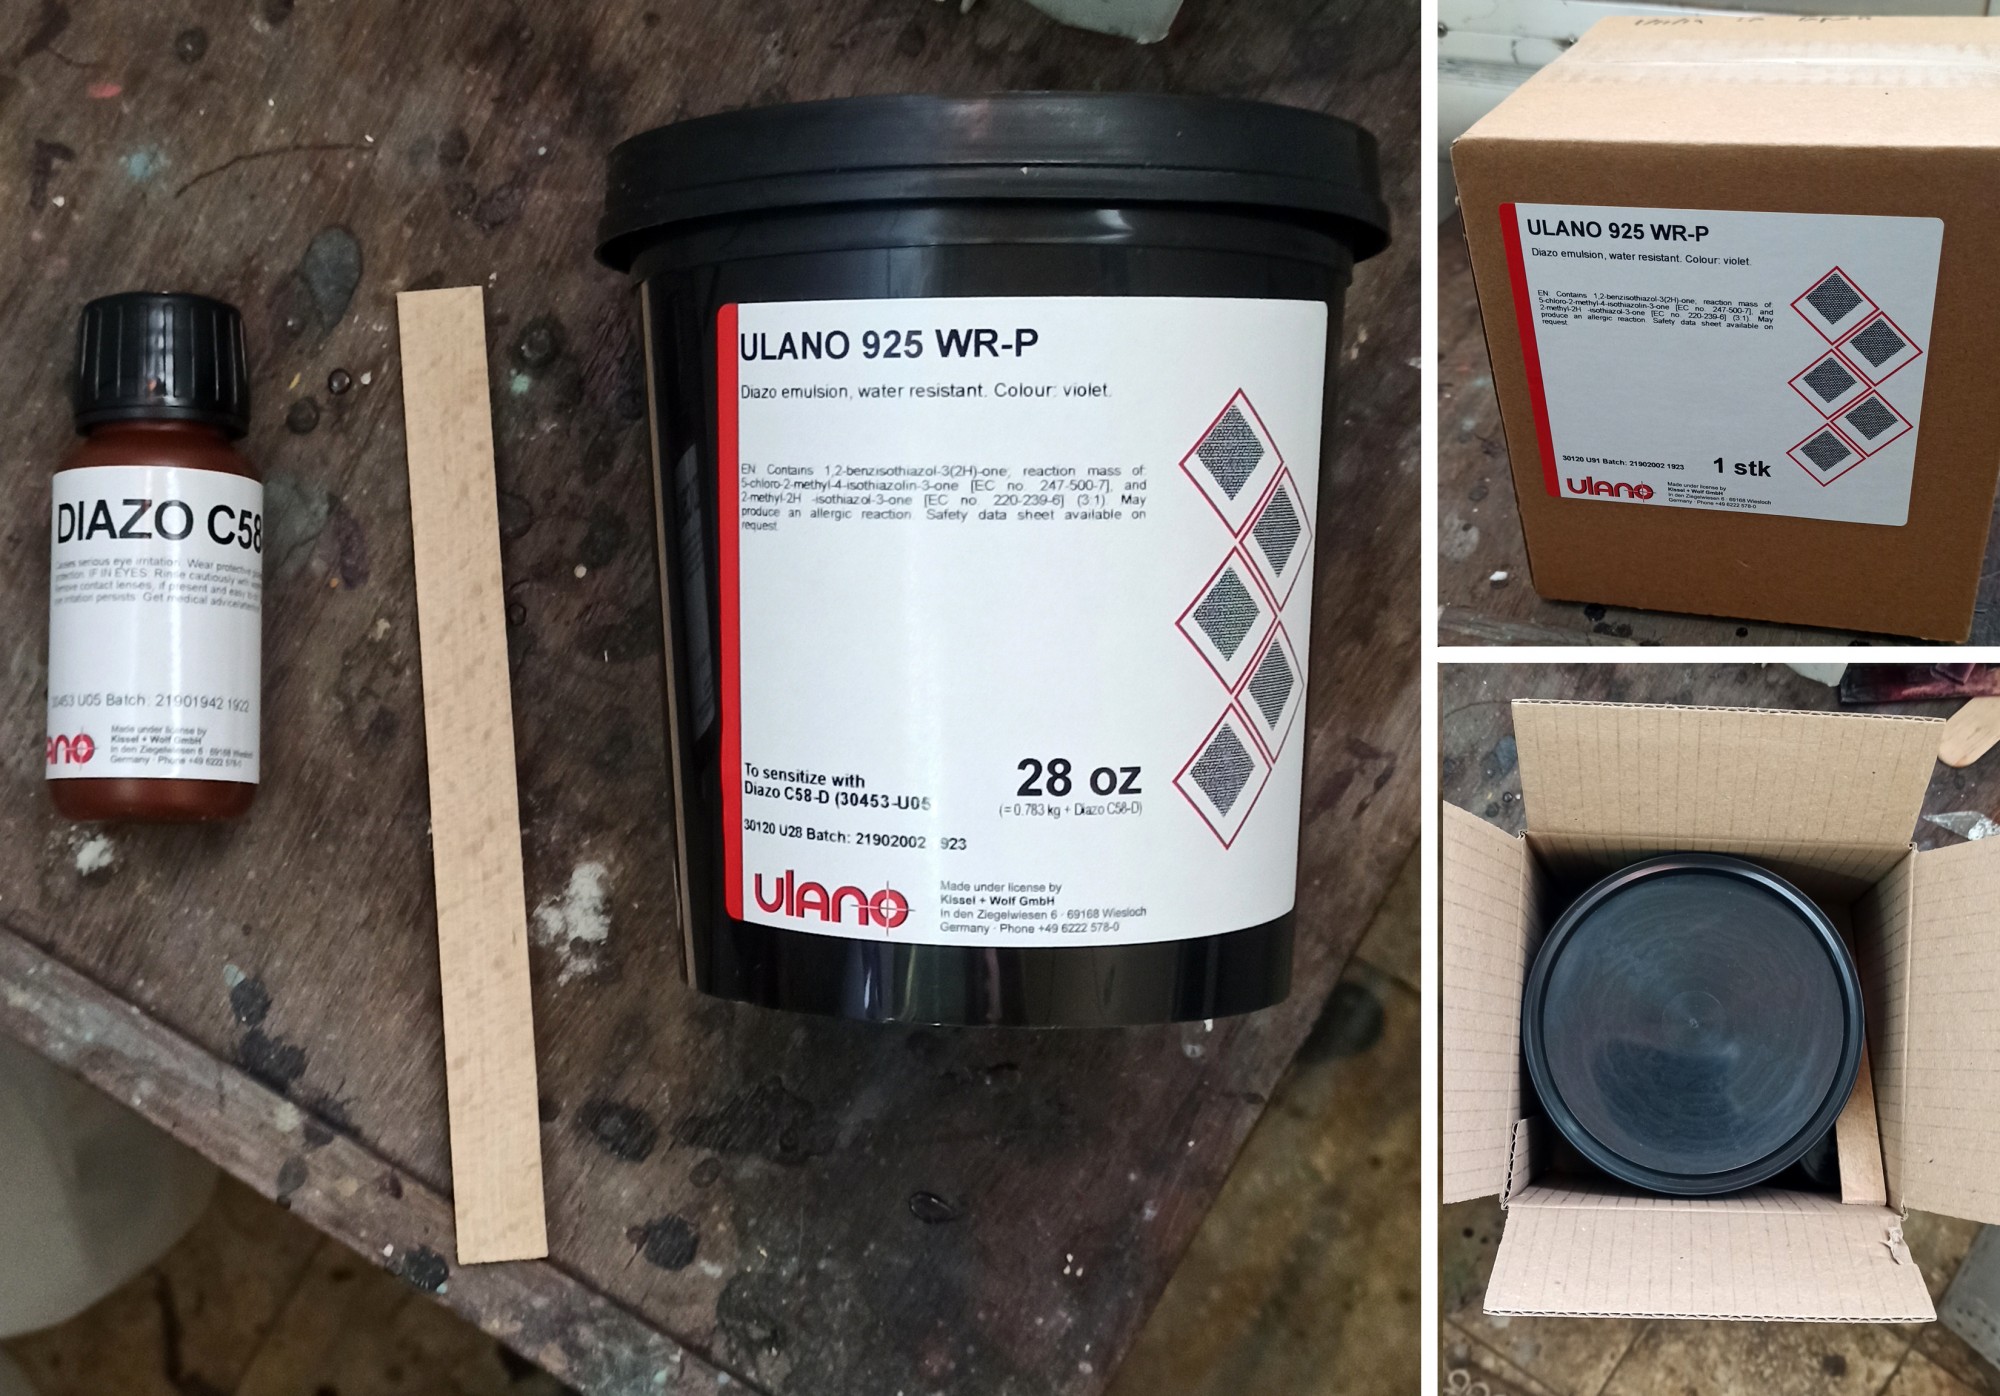
Two-part emulsion, with the diazo supplied separately
I’ll briefly explain the two-part emulsion. When you open the box, you’ll find a large black container, a small bottle, and a wooden mixing stick. The substance in the bottle (diazo, a light-sensitive powder) and the material in the container (a glue-like substance called emulsion) need to be mixed together to activate the emulsion and make it light-sensitive — which is essential for preparing a screen for printing.
For the next steps involving the emulsion (mixing it and coating the screen), make sure to work in a dimly lit area (it doesn’t need to be completely dark — just turn off lights and close blinds), in a well-ventilated space, and away from children.
Put on latex gloves, carefully open the bottle cap, and remove the airtight seal. Fill the bottle with regular tap water up to the marked line. Close it tightly and shake thoroughly so the powder mixes evenly with the water (about one minute of vigorous shaking).
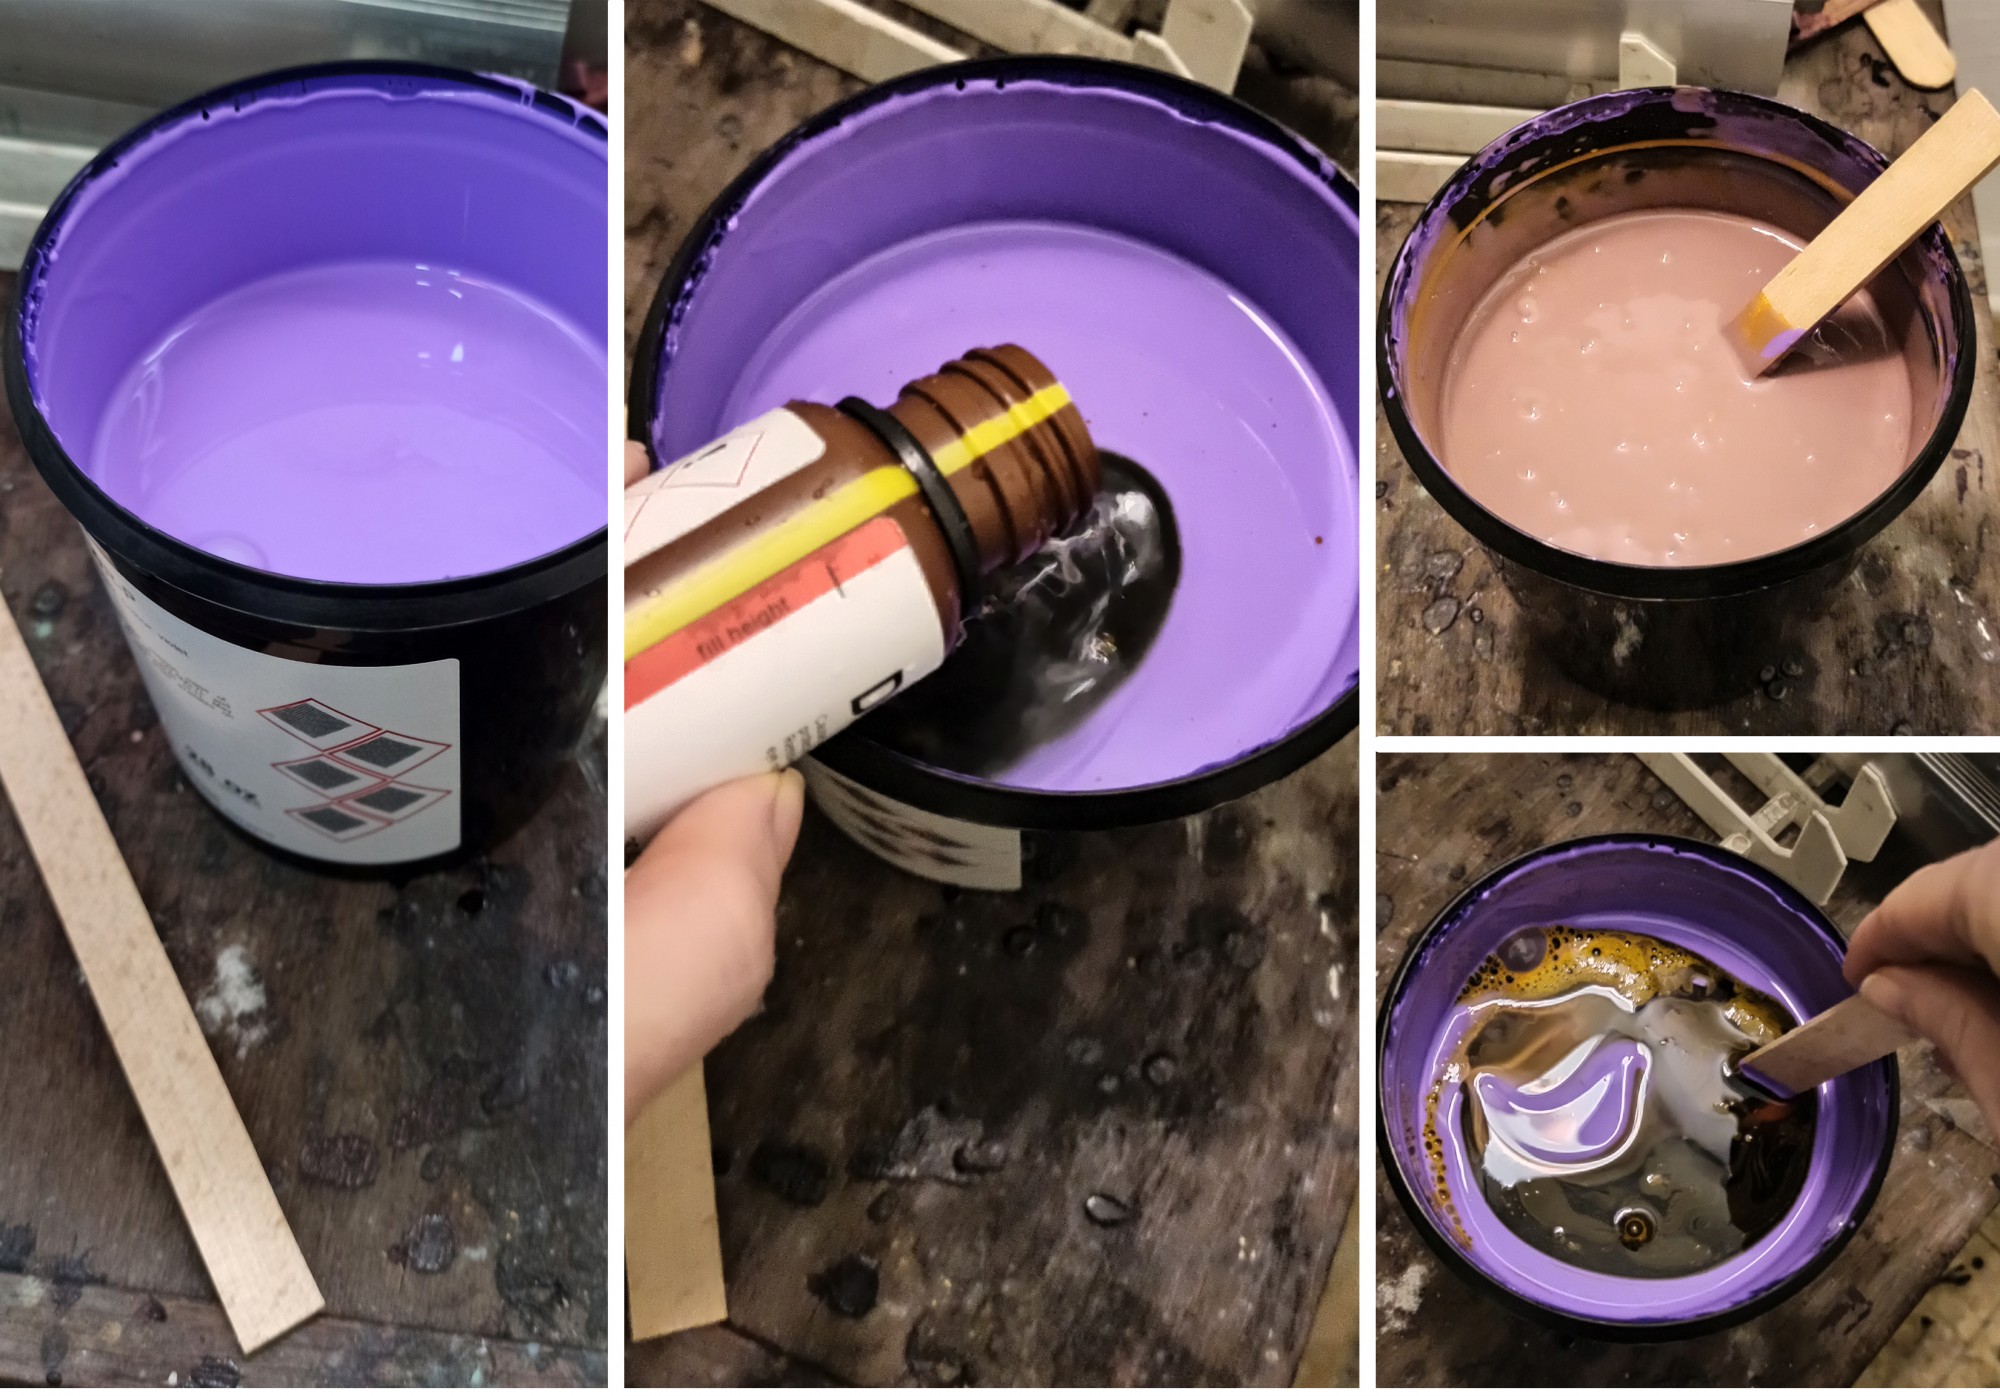
And now — mix everything together.
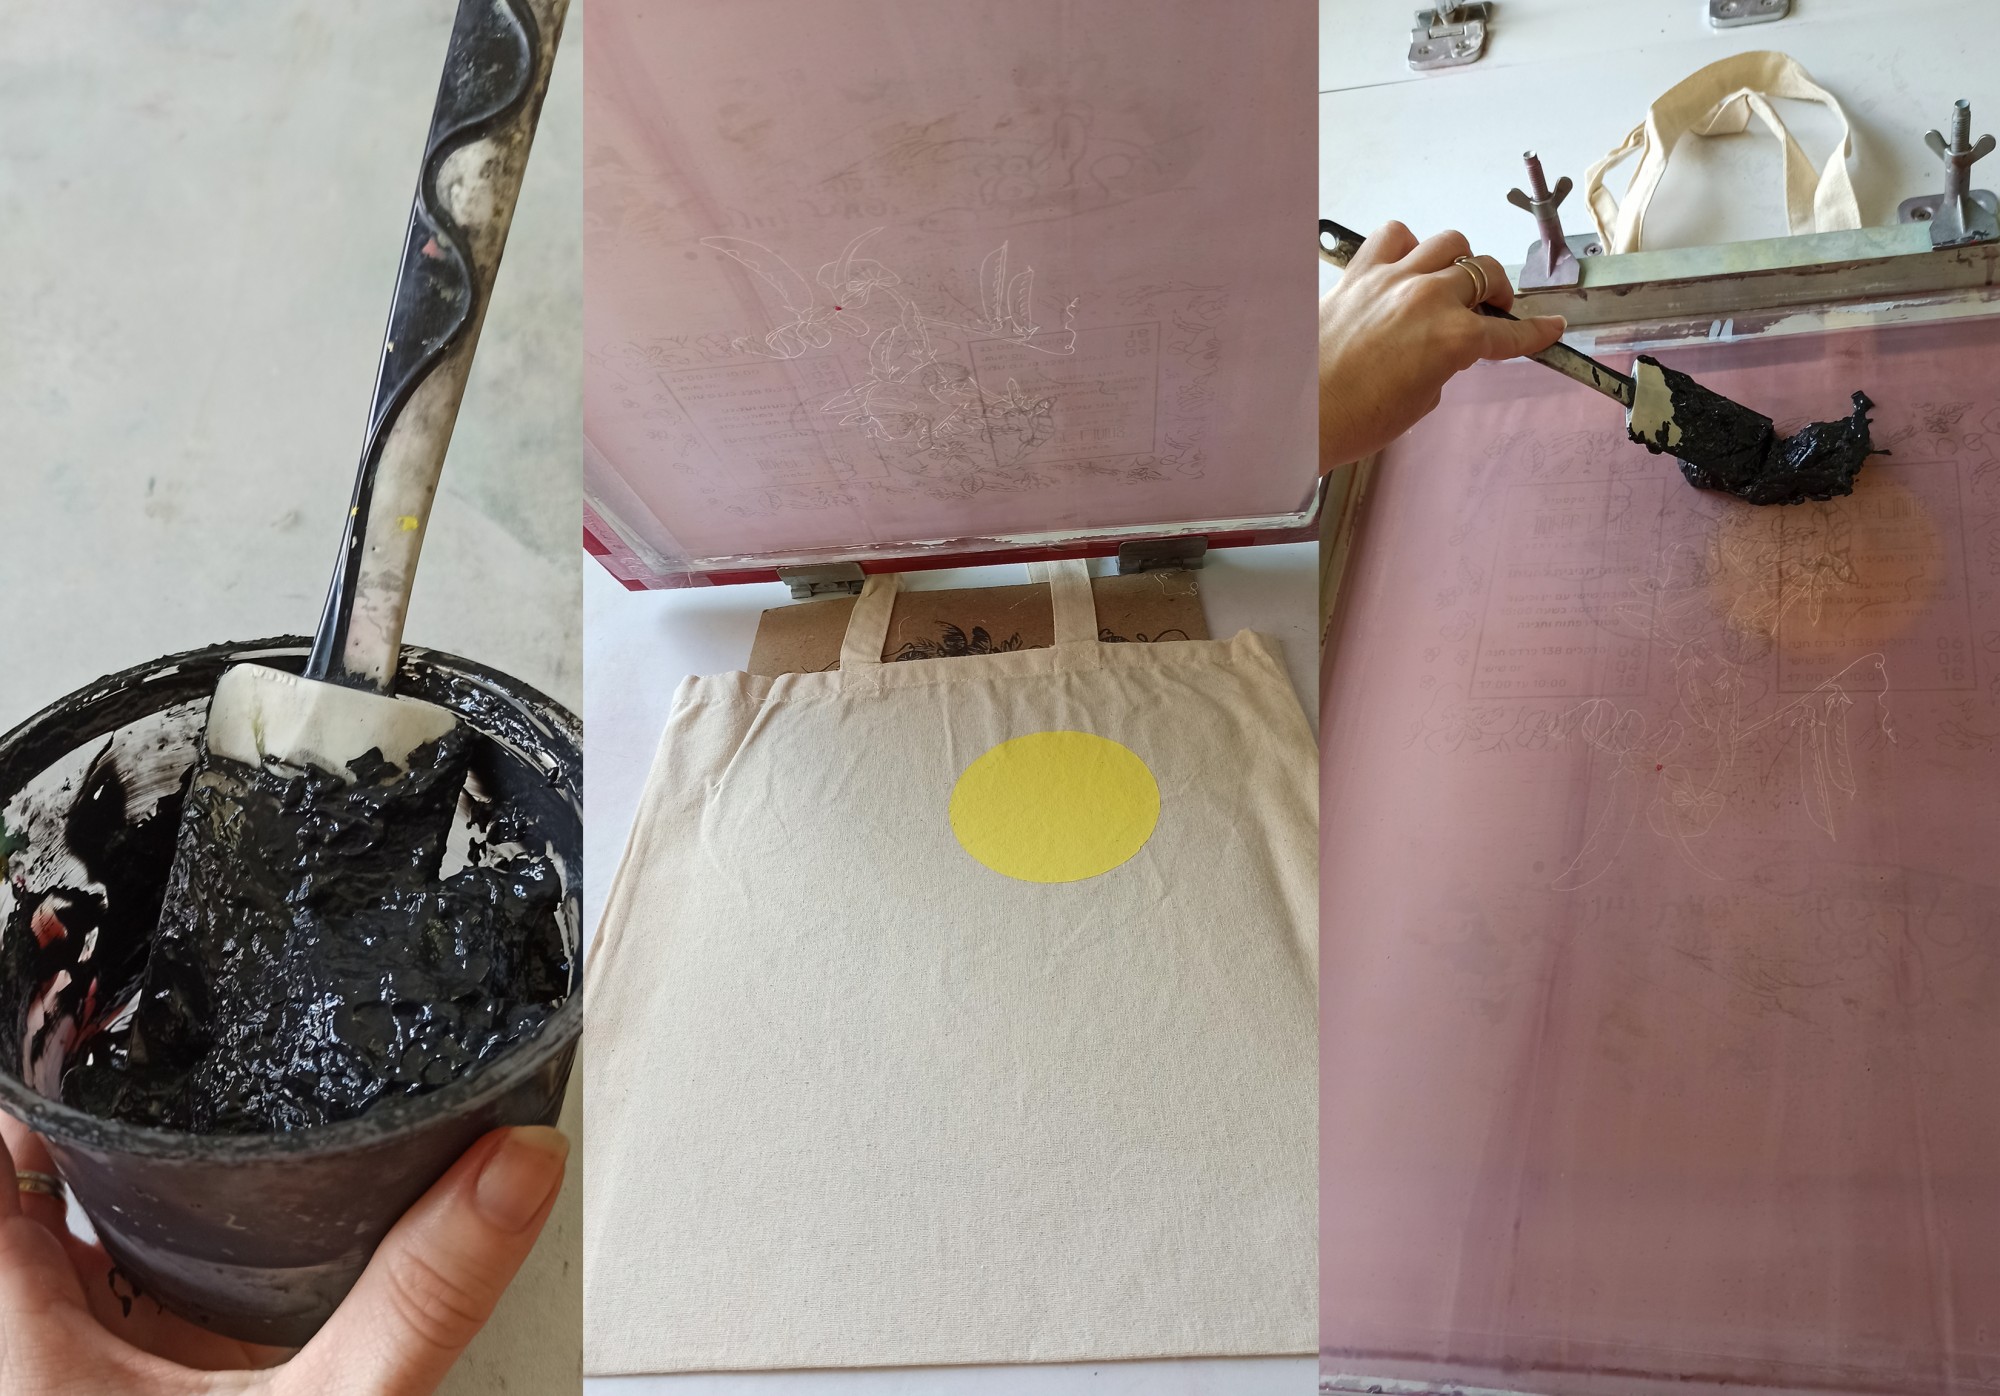
Pour the contents of the bottle into the large emulsion container and stir for several minutes using the wooden stick provided. The final mixture should be uniform and have a different color from the emulsion’s original color. For example, my emulsion starts out purple and turns pink after mixing. Each manufacturer makes their emulsion in slightly different colors so it’s easy to identify — it’s partly a branding choice — which is why you’ll see different colors on the market.
3. Coating the screen with emulsion
In some tutorials I’ve come across, people recommend waiting one to two hours after mixing the emulsion to allow any air bubbles created during mixing to dissipate. I’ve found that this doesn’t really make a difference, so I don’t recommend waiting.
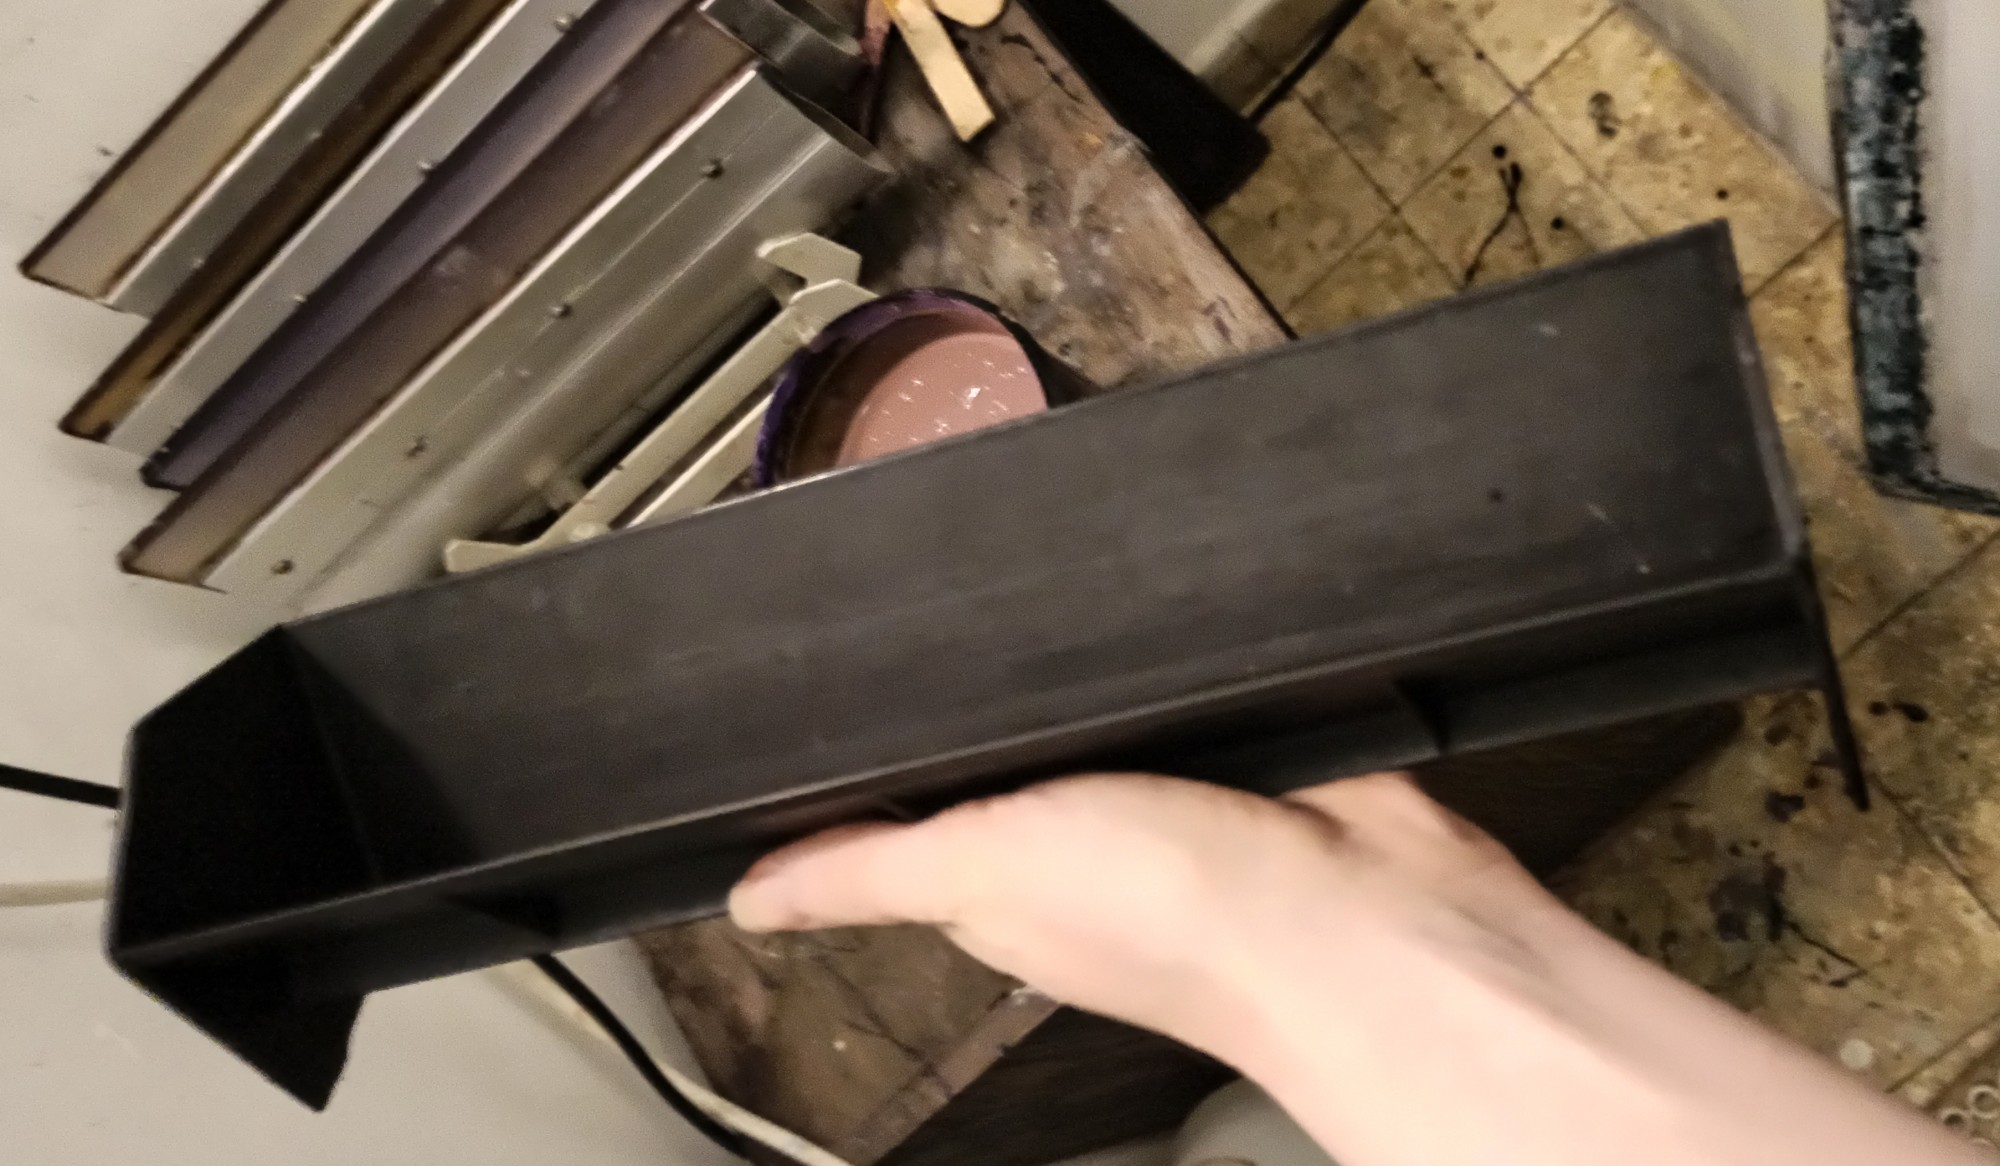
At this stage, we’ll use a scoop coater (an emulsion coating tool), which is a specialized tool available from screen-printing suppliers. The scoop coater has a base it stands on and two coating edges: one thick and one thin. It’s recommended to apply the emulsion using the thin edge, in order to create a thin, even layer of emulsion on the screen — which is exactly the goal at this stage.
Continue working in the dimly lit room, and make sure to use a surface you don’t mind getting dirty — such as an old dresser, or cover everything well with newspapers or plastic sheets. Emulsion drips can leave stains that are very difficult or impossible to remove later, so pay attention to how (with gloves and suitable clothing) and where you’re working.
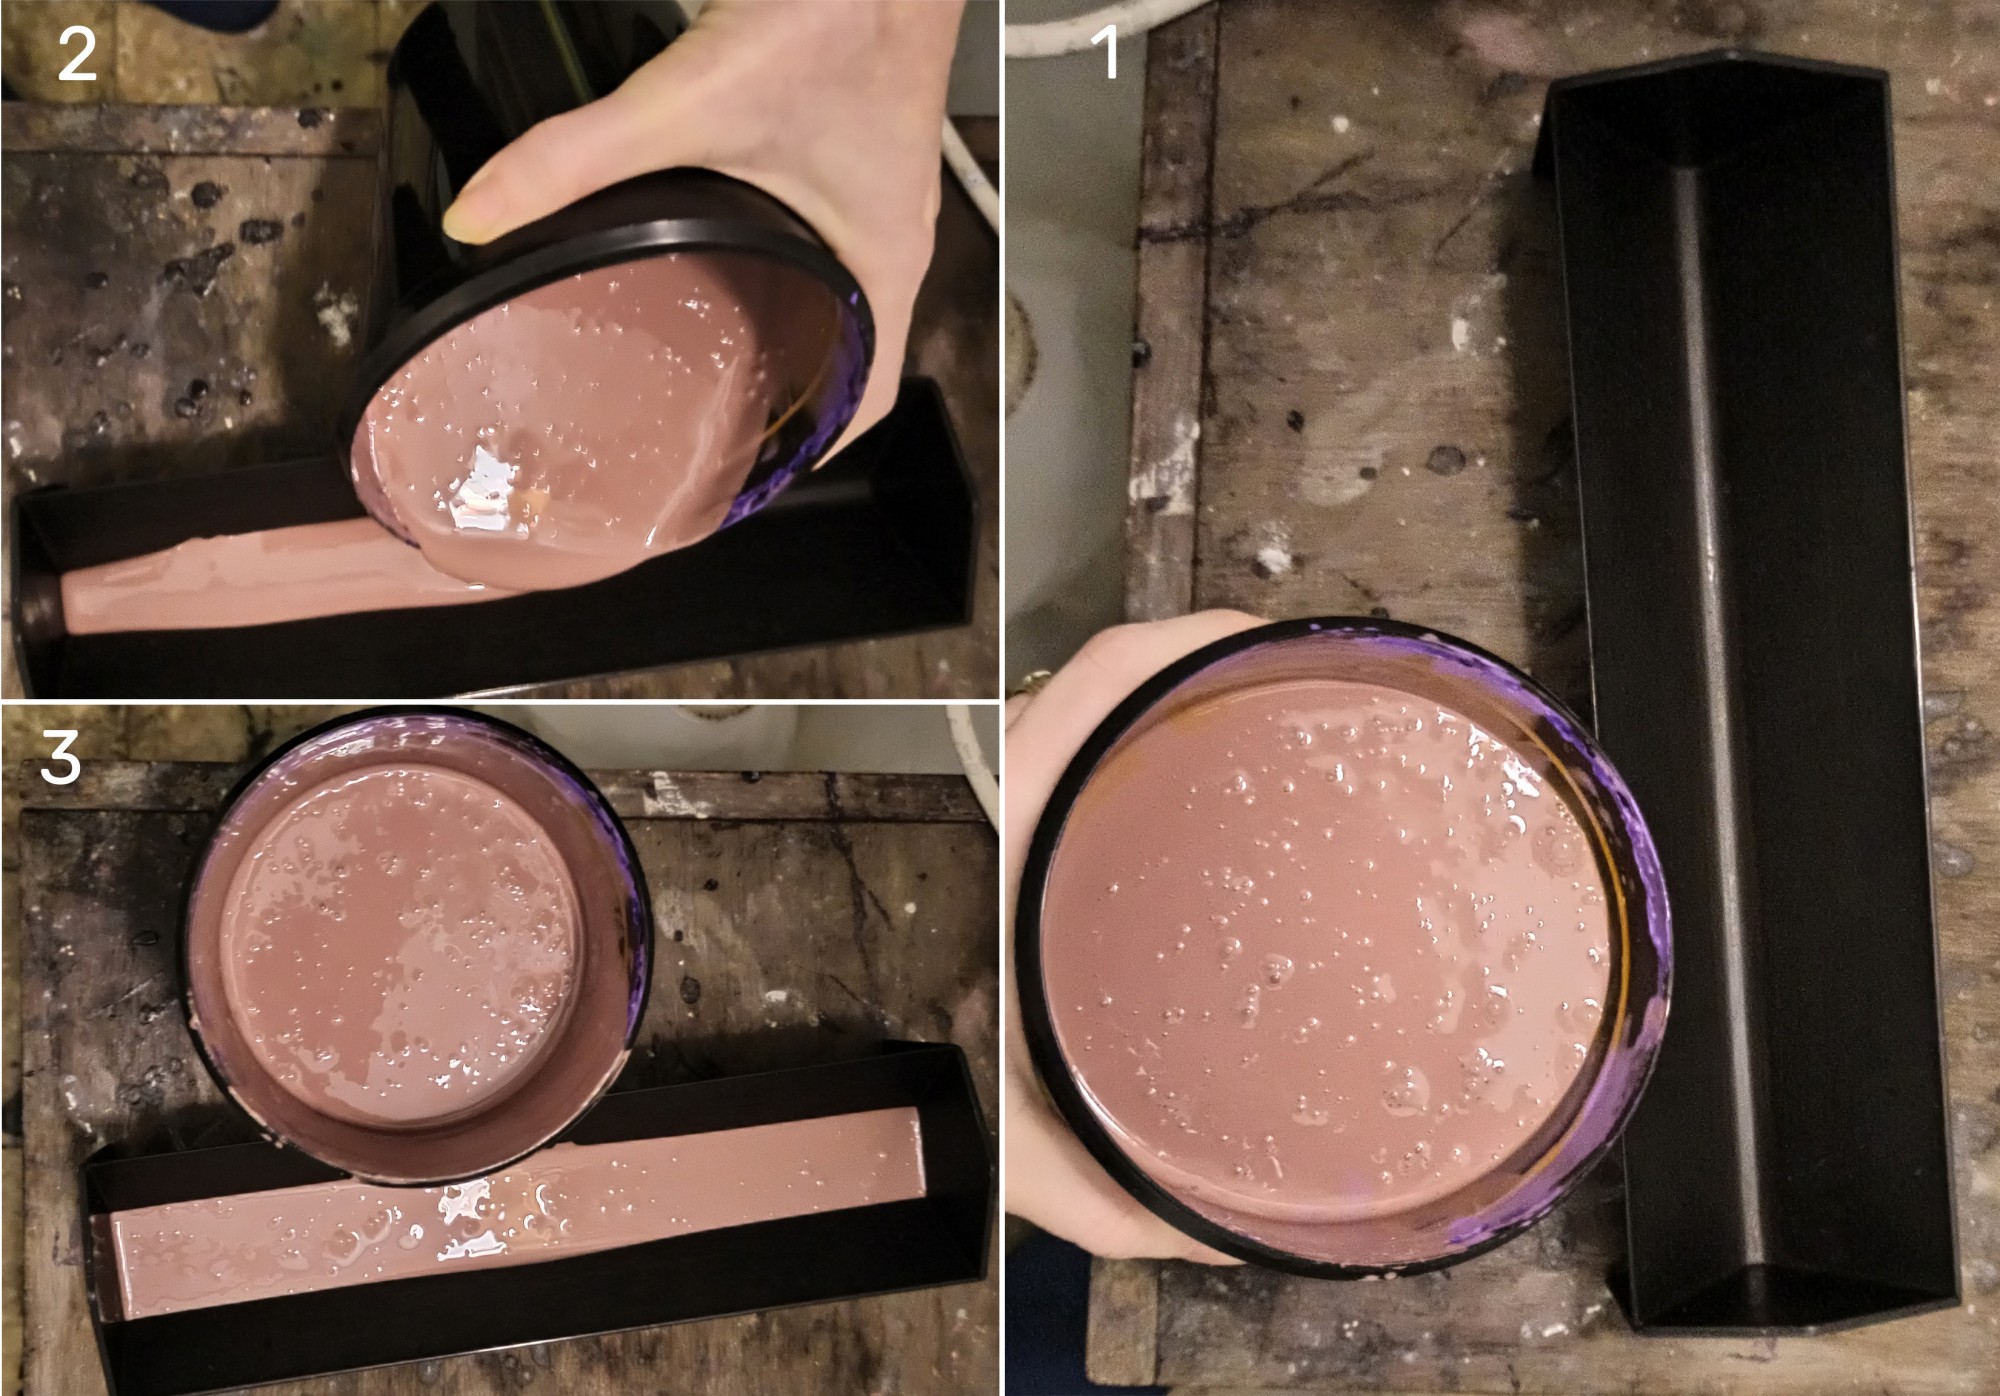
Pour a generous amount of emulsion into the scoop coater, simply by pouring it from the container into the tool, as shown in the photos. Fill the scoop coater to about one-third to one-half of its height.
When you’re done, there may be a few drops of emulsion left dripping from the container — I usually wipe them away with the wooden stick I used earlier for mixing.
Now bring out the screen you want to work with. The screen should be completely clean — free of leftover emulsion, oil, dust, or any other dirt. It’s recommended to wash the screen a day before coating it with emulsion, so it has enough time to dry completely.
Here’s the process for coating a screen with emulsion:
Set up a comfortable workspace:
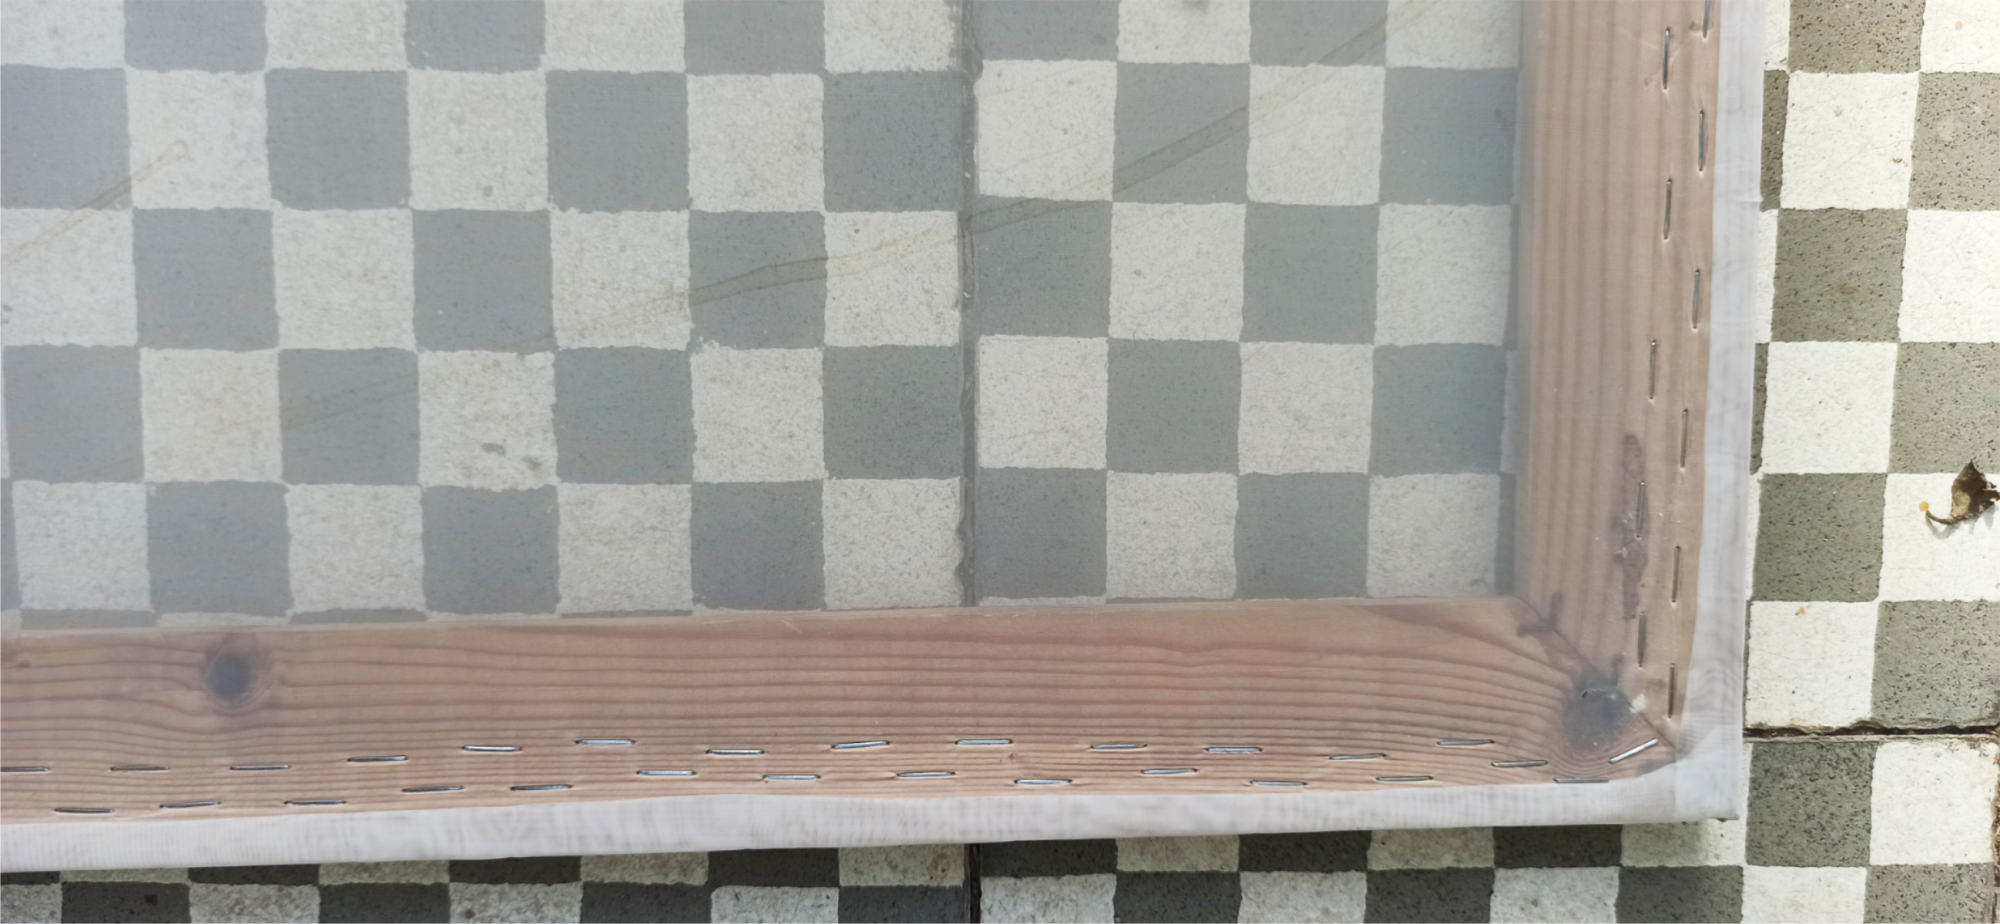
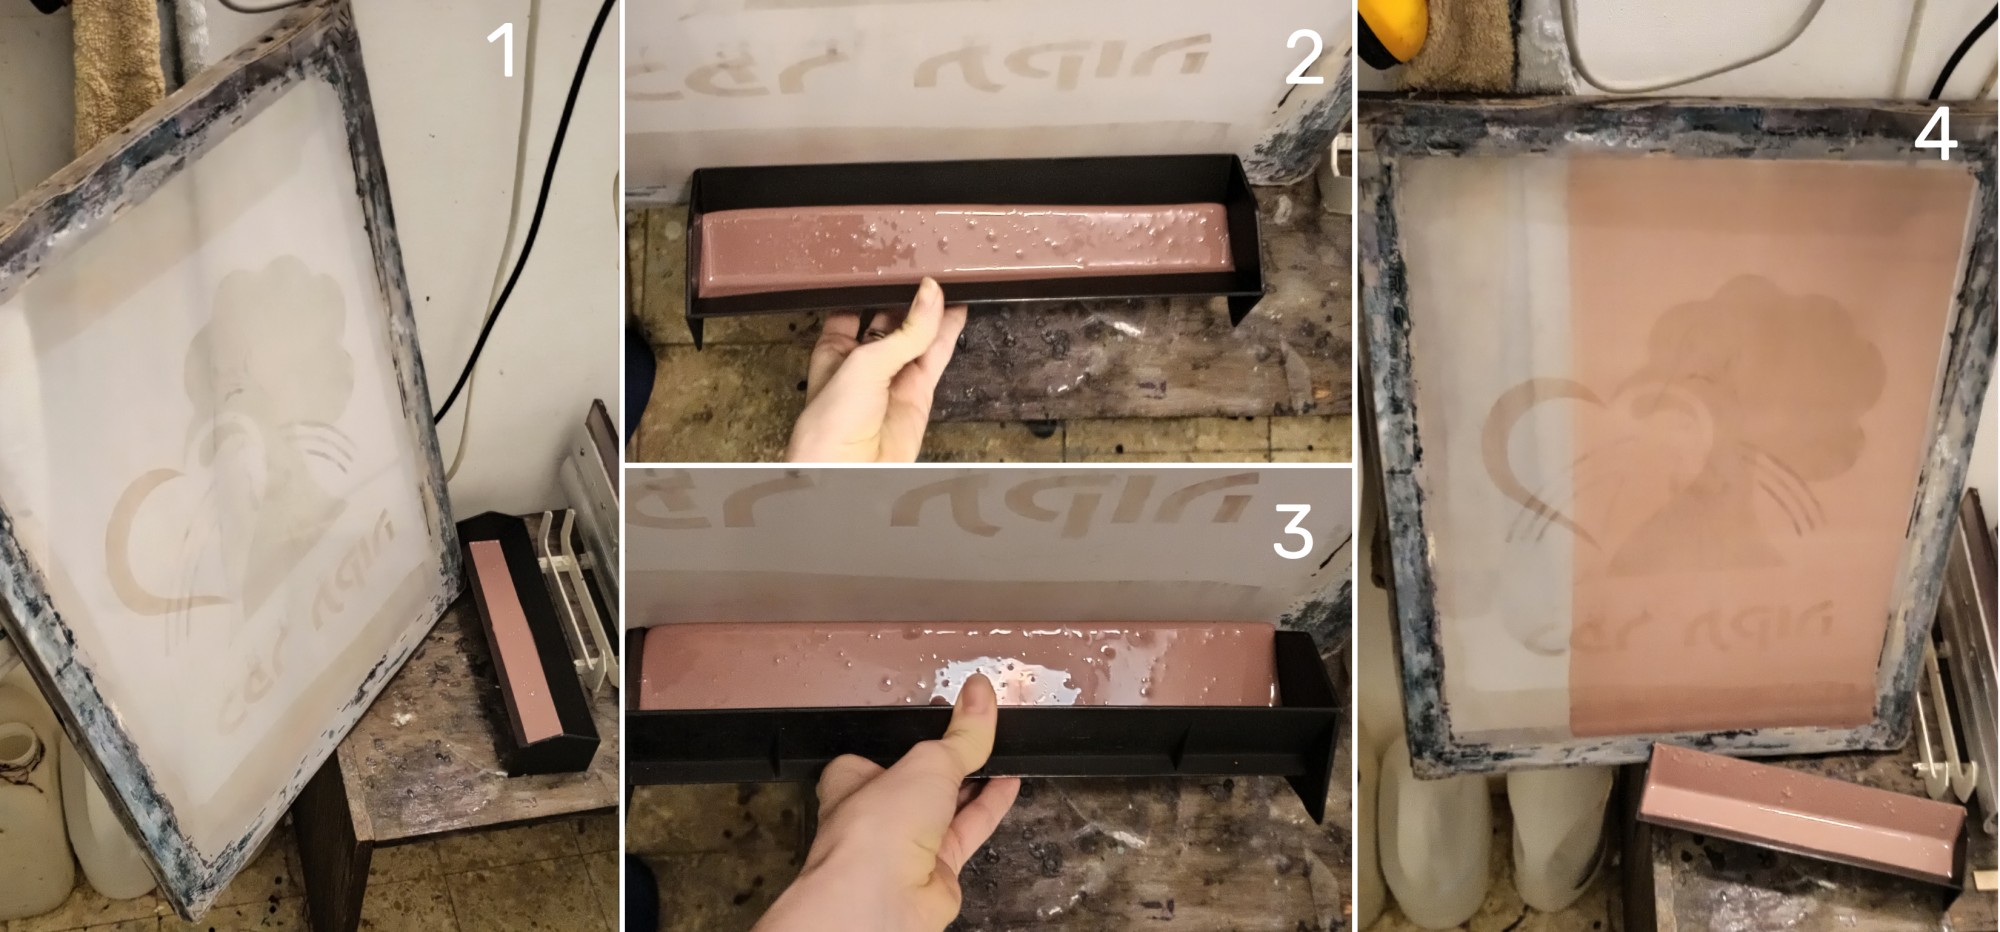
Use a low cabinet or table you don’t mind getting dirty, plus an empty wall. The easiest method for beginners is to place a wide board against the wall and lean the screen diagonally against it, with the board positioned between the wall and the screen. You can’t see that setup in my photos because I use a more advanced method: I hold the screen with one hand and the scoop coater with the other. With practice, you’ll likely get comfortable with this quicker technique too.This is where the board becomes useful:
With the flat side of the screen facing you, hold the scoop coater with both hands. Place the thin edge of the scoop coater against the mesh, about 1 cm above the frame (see photo 2). The board keeps the screen at an angle, which makes the next step possible. Keep the scoop coater pressed against the mesh, apply gentle pressure, and tilt it slightly toward the screen so the emulsion flows toward the mesh (photo 3). Once you begin applying pressure, keep it consistent throughout the coating process.Once the emulsion touches the mesh along the full width of the scoop coater, maintain the same angle and start pulling the scoop upward along the screen while keeping steady pressure against the mesh. When you reach about 1 cm before the top frame, tilt the scoop back so the emulsion flows away from the screen and back into the coater. Keep pressing firmly as you do this. Consistent pressure is the key here. After the emulsion returns into the scoop, continue moving upward until you reach the frame to collect any remaining emulsion and avoid drips.
The result, as shown in photo 4, should be:
even and uniform,
free of drips along the edges,
coated with a very thin layer of emulsion.
All of this depends on applying steady, even pressure between the scoop coater and the screen while coating.
As you can see, my scoop coater is narrower than the width of the screen, so I repeat the same process on the left side. After coating the flat side of the screen, flip it over and repeat the same process on the side where the frame protrudes.
4. Preparing the artwork on a transparency sheet
While the emulsion is drying, we have time to prepare the image that will be transferred onto the screen in the next step to make it ready for printing.
The graphic or illustration you want to print must be transferred onto a transparency sheet using solid, opaque black only. If you want to print the same design in several colors, you’ll need to separate the artwork into layers (one layer per color). You can read more about preparing artwork for transparencies and color separation in the linked guides.
There’s also a manual method for making transparencies: instead of printing from a computer, you can draw directly onto the transparency sheet. You can use any opaque black material, such as acrylic paint, oil-based markers, and more.
For this demonstration, I chose to print one of my illustrations from the computer onto a transparency sheet. I printed it using the darkest black setting and highest quality, with as much ink as possible. I actually printed it twice, then aligned and taped the two transparencies together perfectly so the black areas would become even darker and more light-blocking.
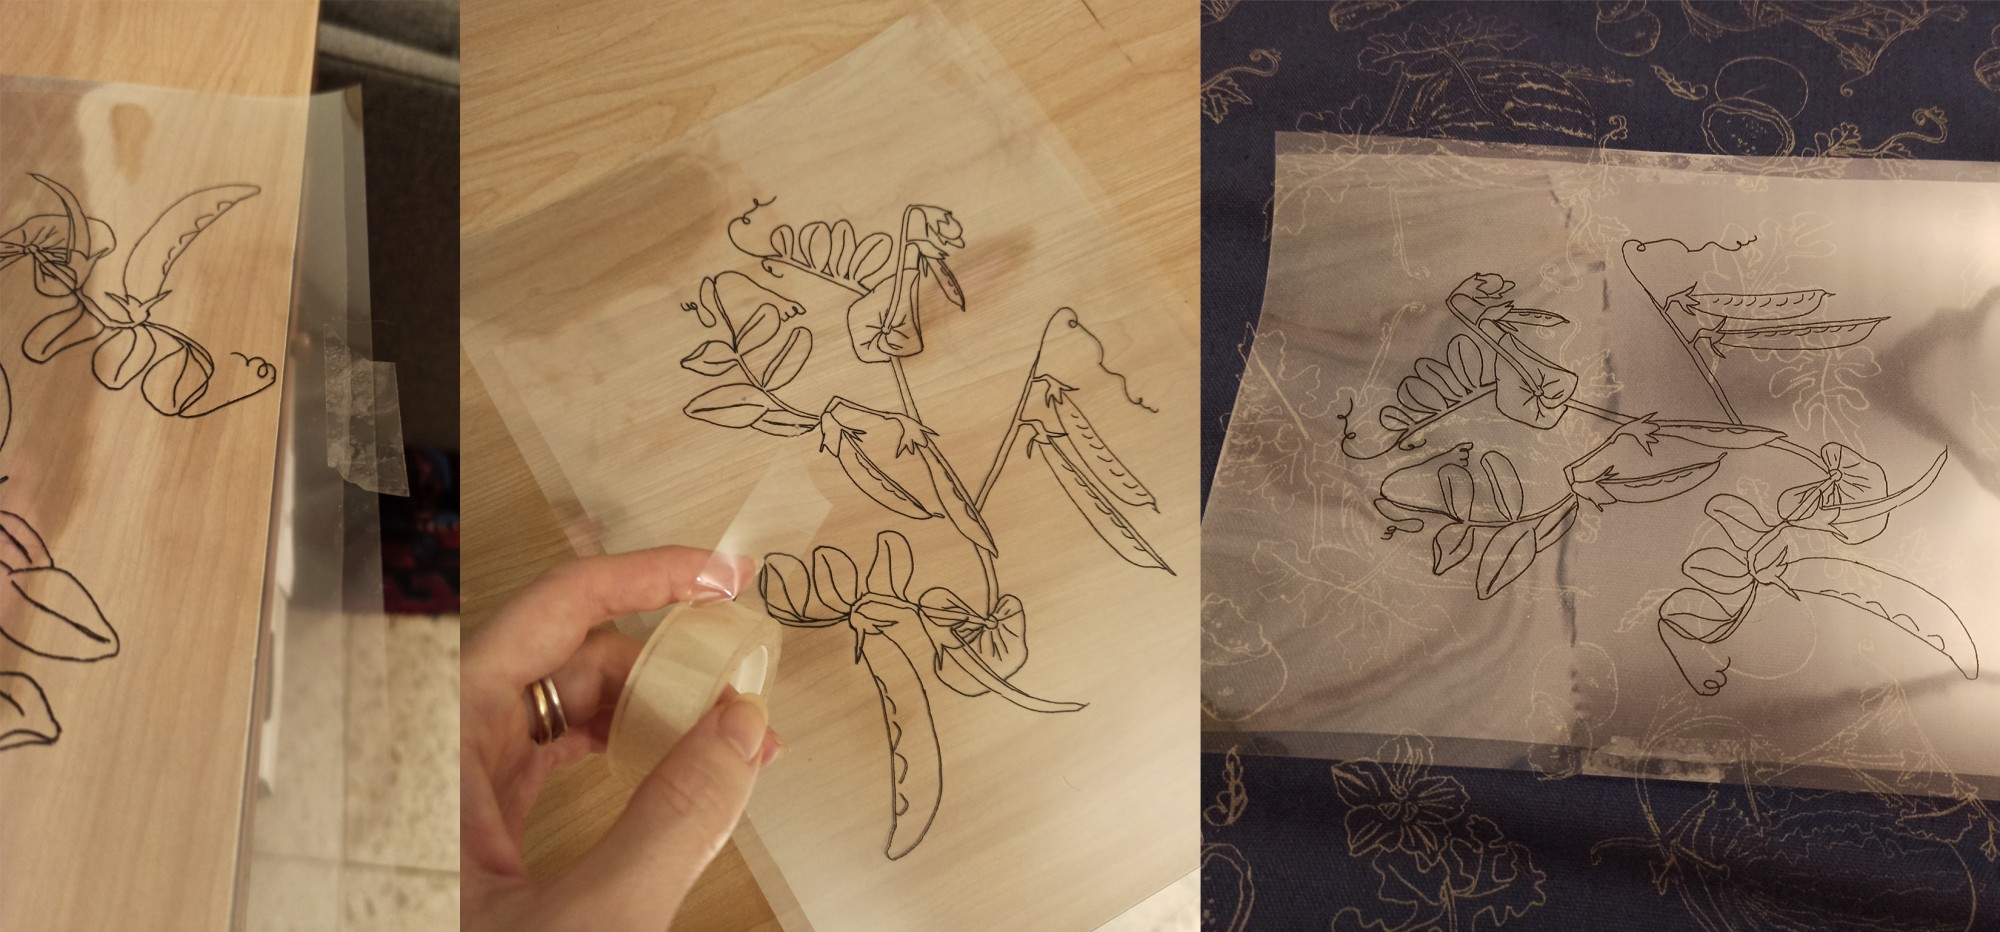
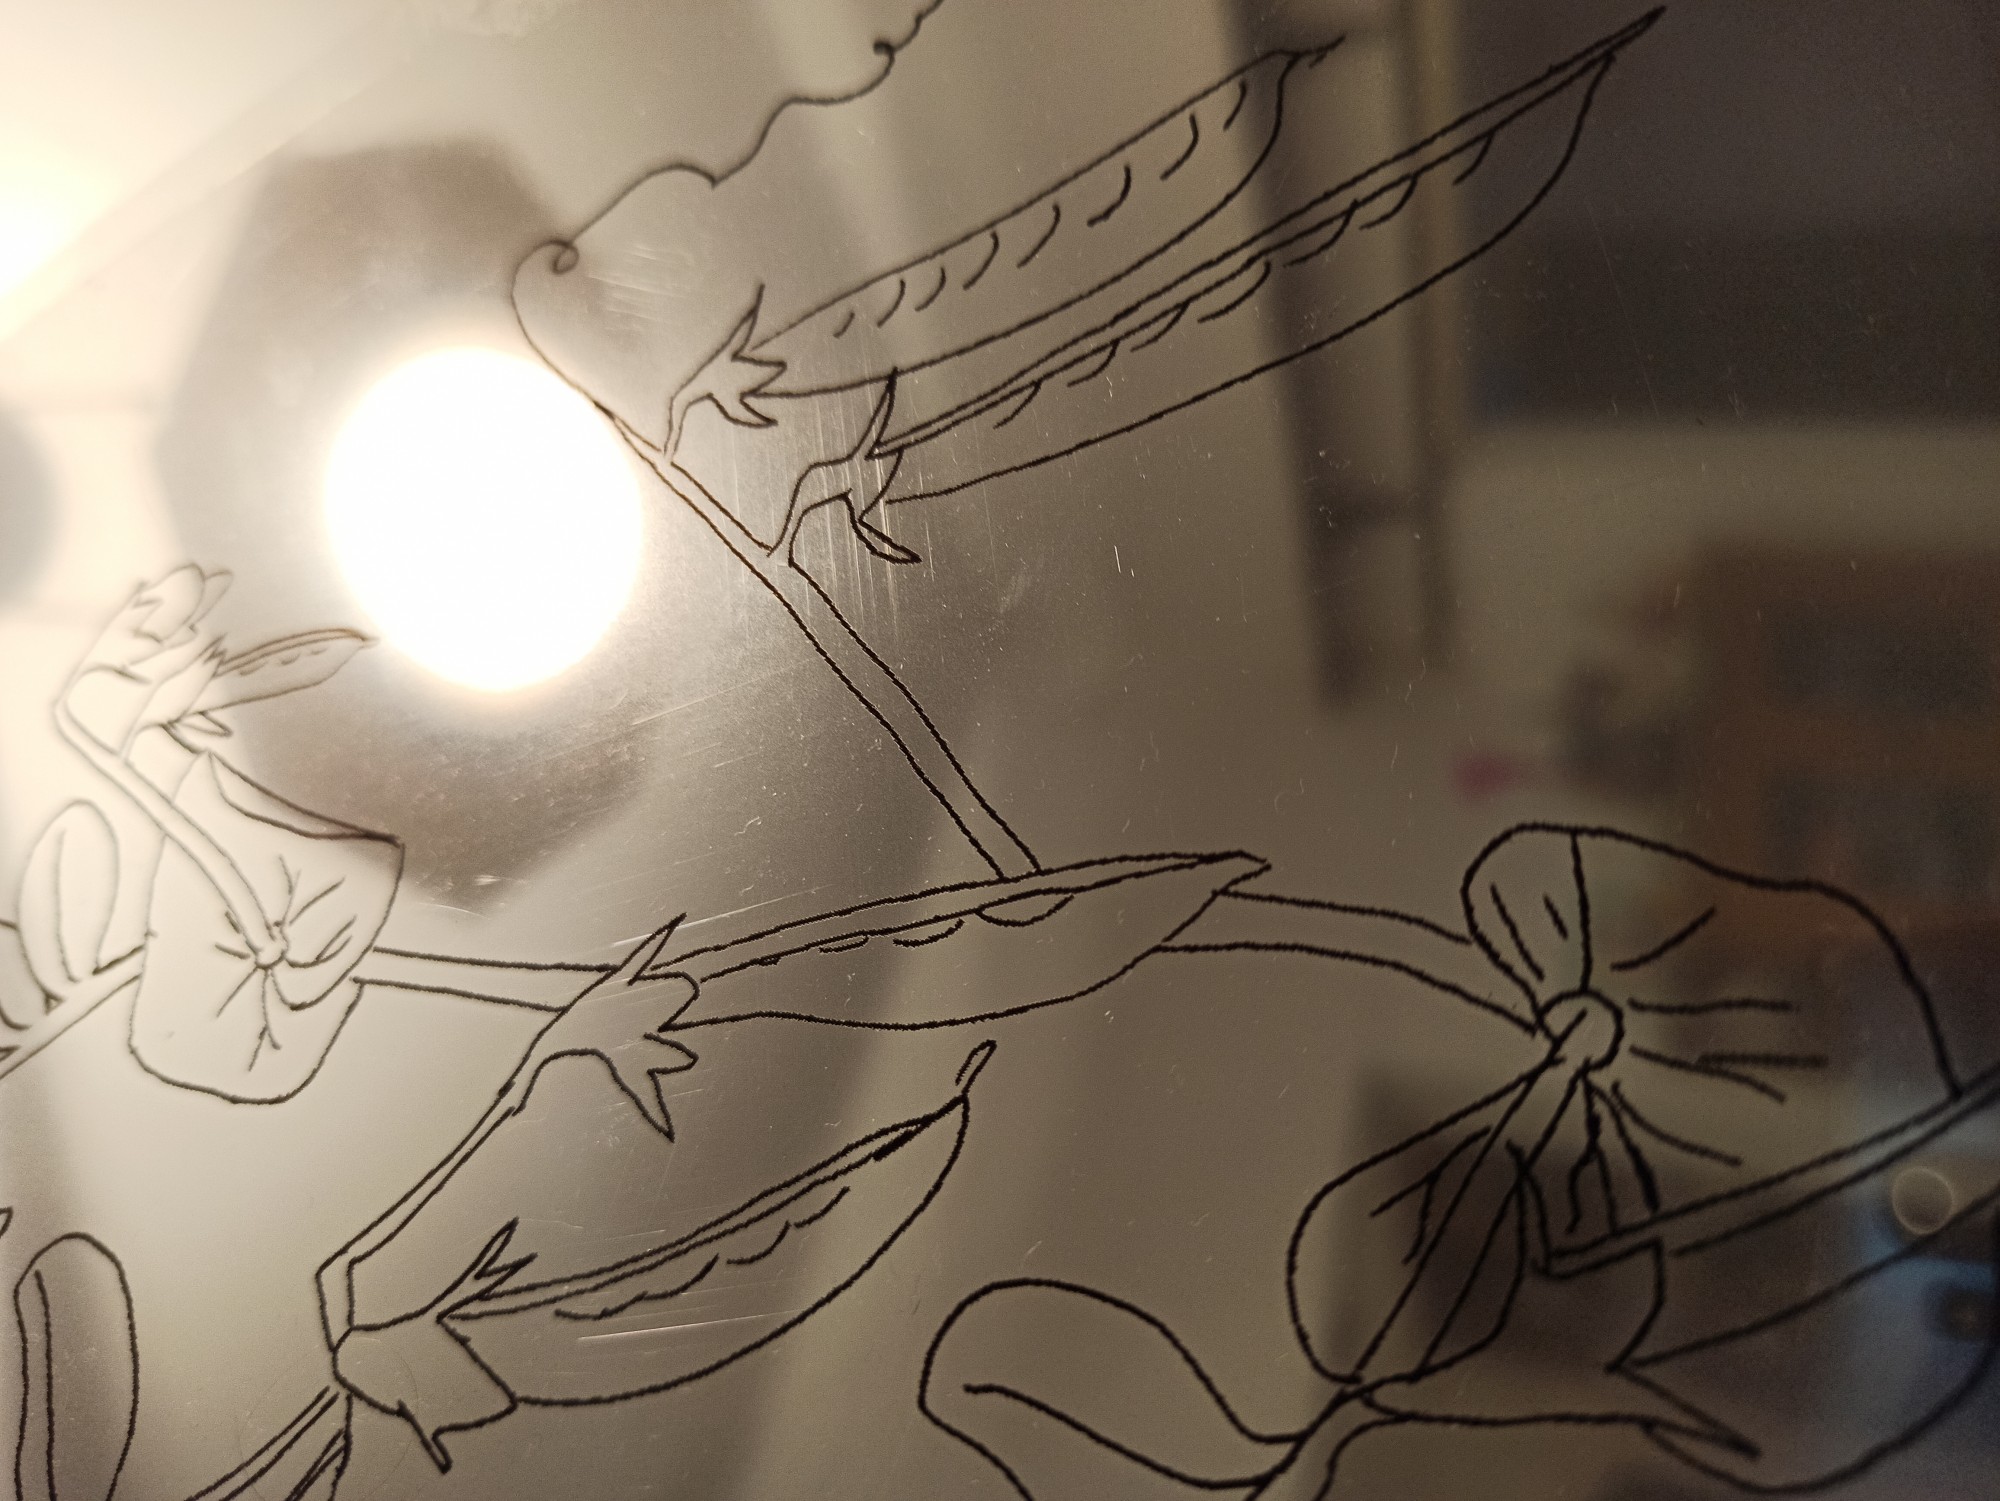
To check whether your black areas truly block light, simply hold the transparency sheet up against a light source, such as sunlight or a lamp. You’ll immediately be able to tell whether the printed areas appear transparent or fully opaque.
5. Exposing the screen and transferring the image onto it
This is the final step in preparing the screen — after this, we’ll be ready to print with it.
To expose the screen and transfer your graphic or illustration, you’ll need an exposure unit (light table). You can either build one yourself or buy one from someone who has made one.
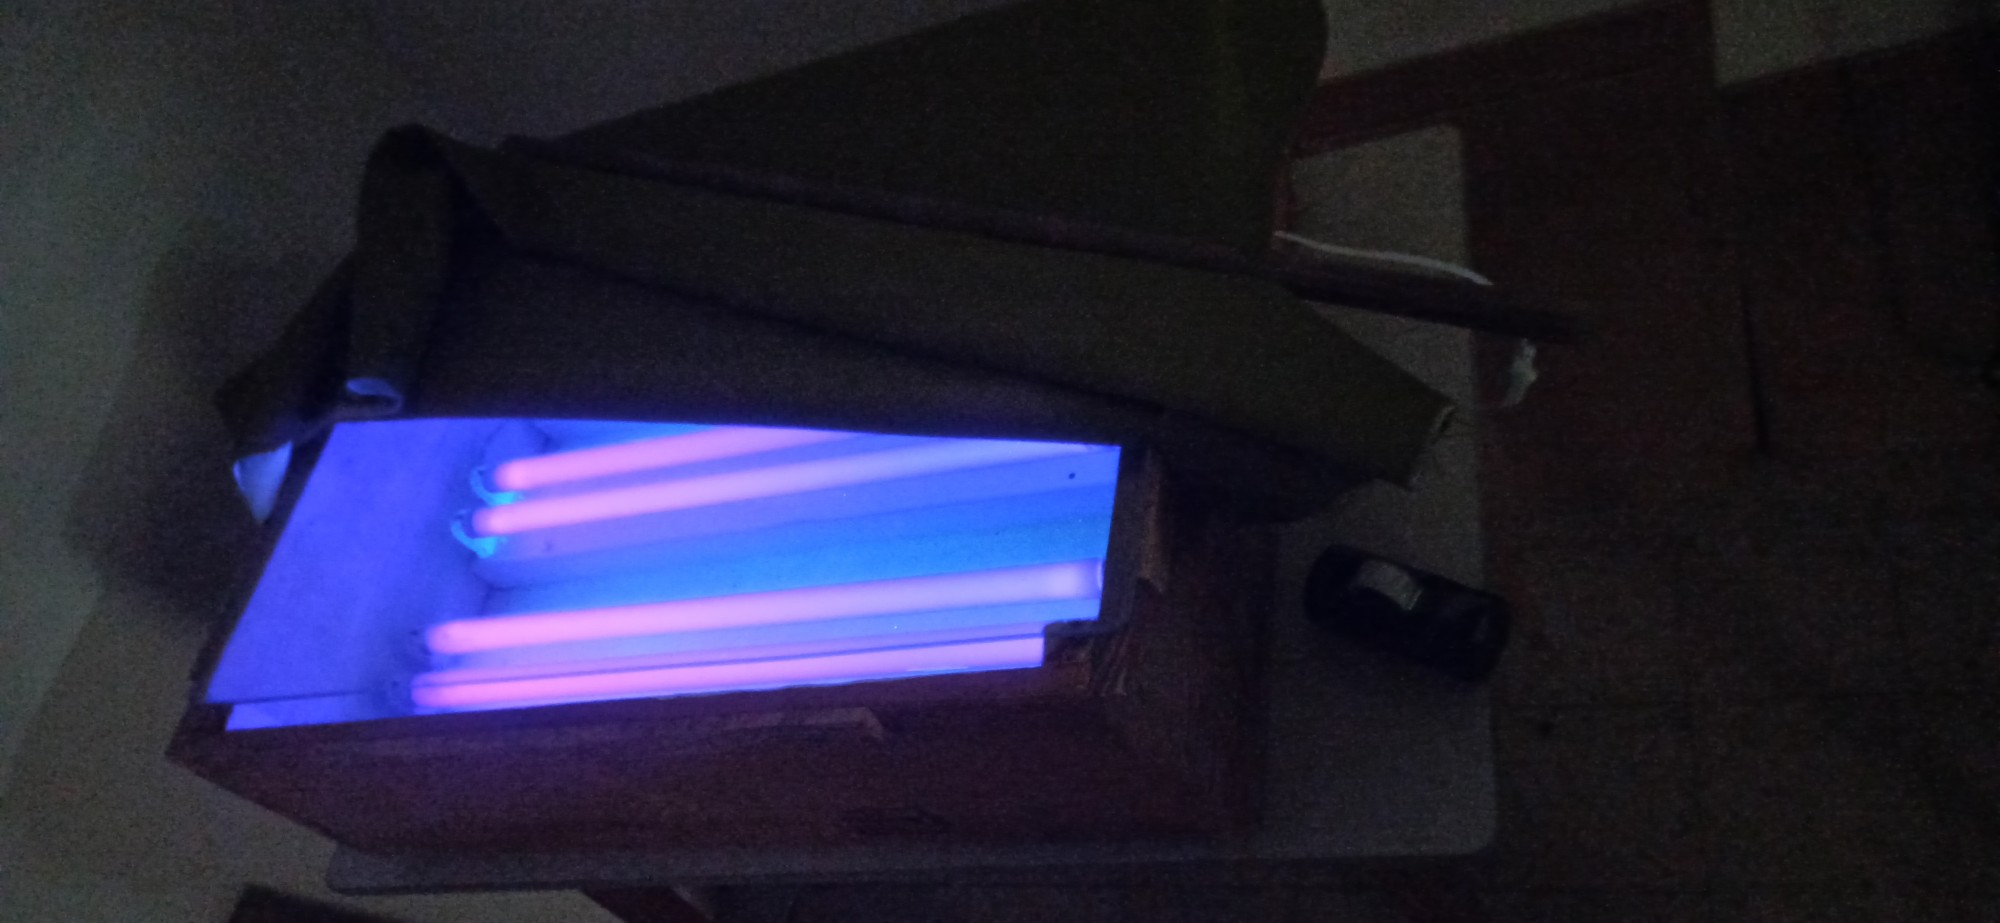
I built my own exposure unit using:
a large wooden box,
a custom-cut glass panel fitted to the box,
and fluorescent bulbs.
My setup uses UV bulbs, but that’s not essential at all. Any fluorescent light can work — essentially, any light source that emits UV light (like sunlight does) is suitable for exposing the screen.
Why do we need an exposure unit (light table) at all?
Remember that the emulsion is light-sensitive? That’s why we’ve been working with it in dark, enclosed spaces up to this point. (By the way, the next photos were taken in a dark room, so the quality isn’t great — apologies!)
This property allows us to control which parts of the emulsion are exposed to light and which parts stay unexposed, by using controlled light exposure together with opaque black areas on the transparency.
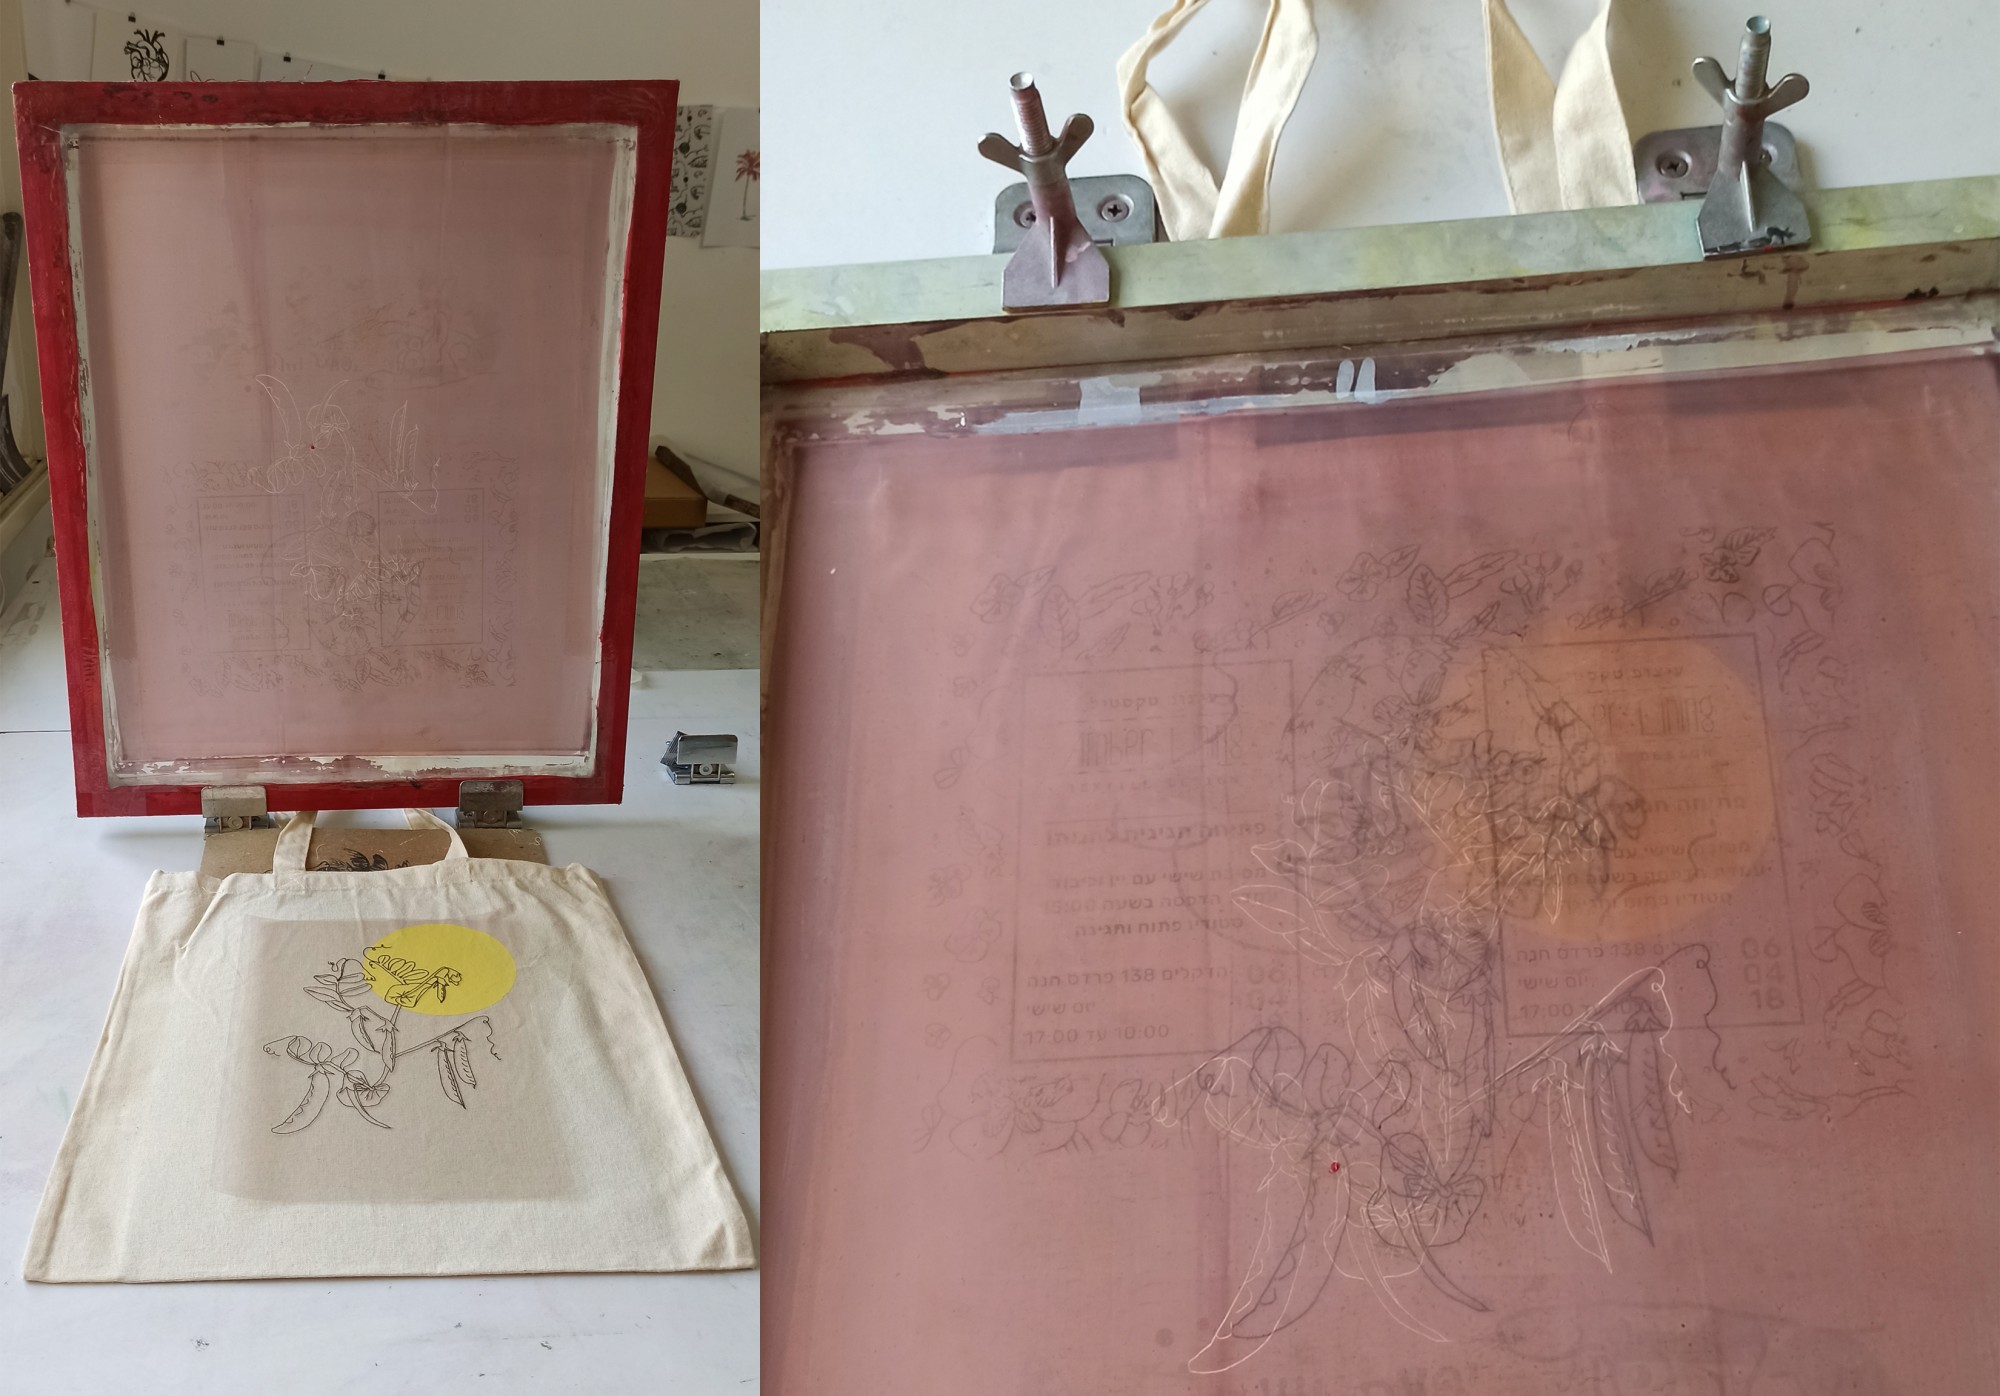
At this stage, we’ll tape the transparency sheet we prepared earlier onto the screen (on the flat side) using a small amount of clear tape. Then we’ll place the screen on top of the glass surface of the exposure unit and cover it with an opaque fabric that blocks light.
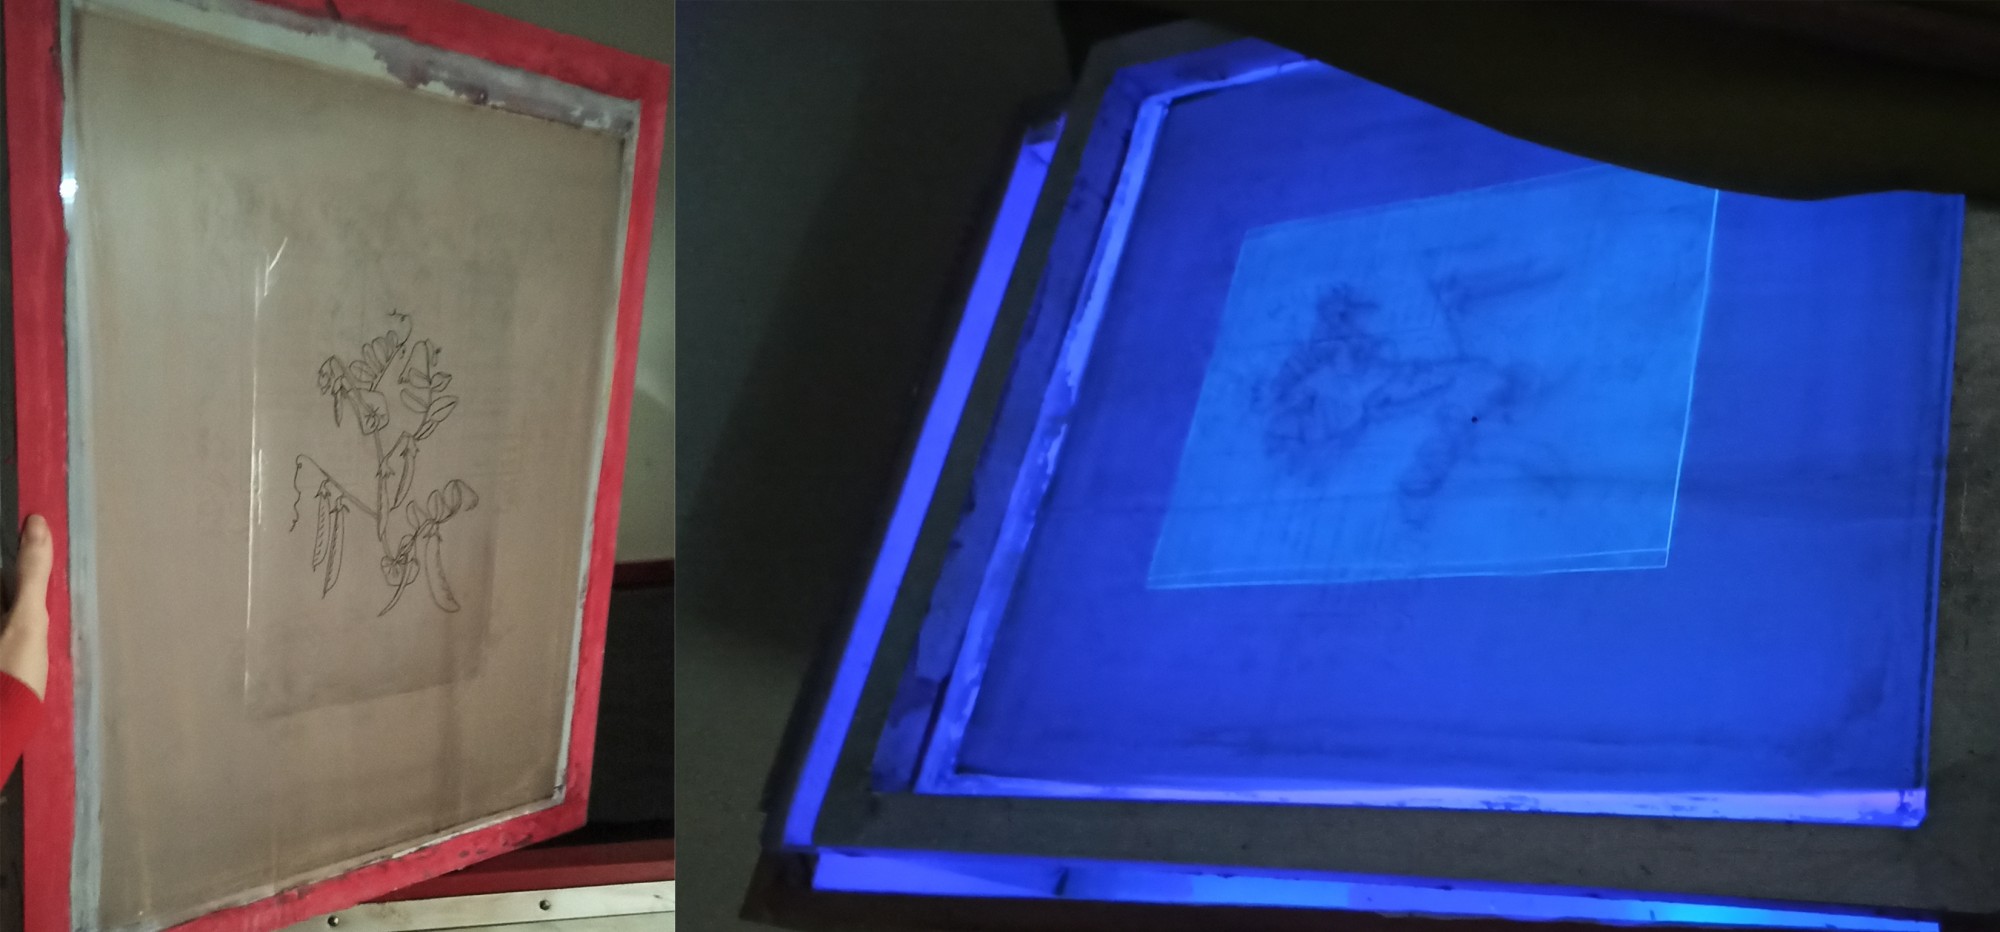
Creating the exposure “sandwich”
Now we need to create a tight sandwich of glass → transparency → screen. Place a board the size of the transparency and a weight (or another small heavy object) on top of the light-blocking fabric covering the screen. The pressure helps press the screen mesh tightly against the glass, preventing light from leaking between the transparency and the emulsion during exposure.
This is important because the whole purpose is to block light from reaching the emulsion where the transparency is printed in solid black. That way, light reaches only the clear areas around the artwork, not the artwork itself.
Exposure time: how long should the light stay on?
Everything is now ready for exposure. A successful exposure means the light stays on for the exact amount of time needed to transfer the image properly — without losing detail and without causing the emulsion to wash away too easily later.
If there were a simple answer, I’d give it immediately — but the truth is: it depends.
Exposure time changes according to many factors:
the type of exposure unit,
number and type of bulbs,
distance between bulbs and glass,
transparency quality,
emulsion type,
and many other variables.
So how do you find the correct exposure time?
The most practical method I know is to use an exposure calculator/test strip. Some suppliers sell them, but I personally use a free exposure test and it works great.
Washing out the screen
Once you’ve found the correct exposure time, exposed the screen, and turned off the lights:
Remove the transparency sheet taped to the screen.
Wash the screen from the flat side using water. A garden hose with a spray nozzle works well because it wets the whole screen evenly and quickly.
This first rinse begins the development process of the image you’ve exposed.
Immediately after exposure, you usually can’t see the image yet. After rinsing, the image gradually becomes visible while the rest of the emulsion stays unchanged.
What happened during exposure?
Areas exposed to light became hardened and bonded permanently to the mesh.
Areas blocked by opaque black on the transparency did not receive light, so the emulsion stayed soft and washes away.
That washed-away emulsion is exactly what creates the open areas where ink will later pass through.
After the initial rinse, continue washing longer (around 2–3 minutes) with more water pressure, focusing gradually on the image areas. Slowly, all the unexposed emulsion should disappear from the places you intended to print through.
Final drying step
When finished, it’s recommended to place the screen flat with the smooth side facing upward, ideally in sunlight, until completely dry.
This can strengthen the emulsion even further — some people call it a second exposure.
At this point, your screen is ready. Time to print!
6. Printing through an emulsion screen
For this demonstration, I’m printing a second layer on a fabric tote bag I printed previously.
What we’ve done so far is:
block the screen with emulsion where we don’t want ink,
leave the screen open where we do want ink to pass through.
Before bringing out the ink and squeegee, there’s one final preparation step.
Place the dry screen on your work surface. Now you need to seal any open mesh areas that weren’t coated with emulsion, to prevent accidental printing through them.
This refers to the 1 cm border near the frame — remember Step 3 of coating the screen? Coating right up to the frame would make the emulsion uneven and too thick, so leaving that margin is unavoidable.
Before printing, simply cover those exposed border areas by applying wide transparent tape to the flat side of the screen. This prevents unwanted ink from passing through around the edges.

The screen is now fully ready for printing.
This is a good time to prepare the items you want to print on. If you’re printing on T-shirts, pillowcases, or tote bags (like in the photos), place a piece of mount board/cardboard inside each item, sprayed lightly with adhesive spray (available at craft or sewing supply stores). This helps:
keep the fabric from shifting during printing,
prevent ink from bleeding through to the other side of the item.
Smooth the fabric over the cardboard and press it down so it sticks securely in place.
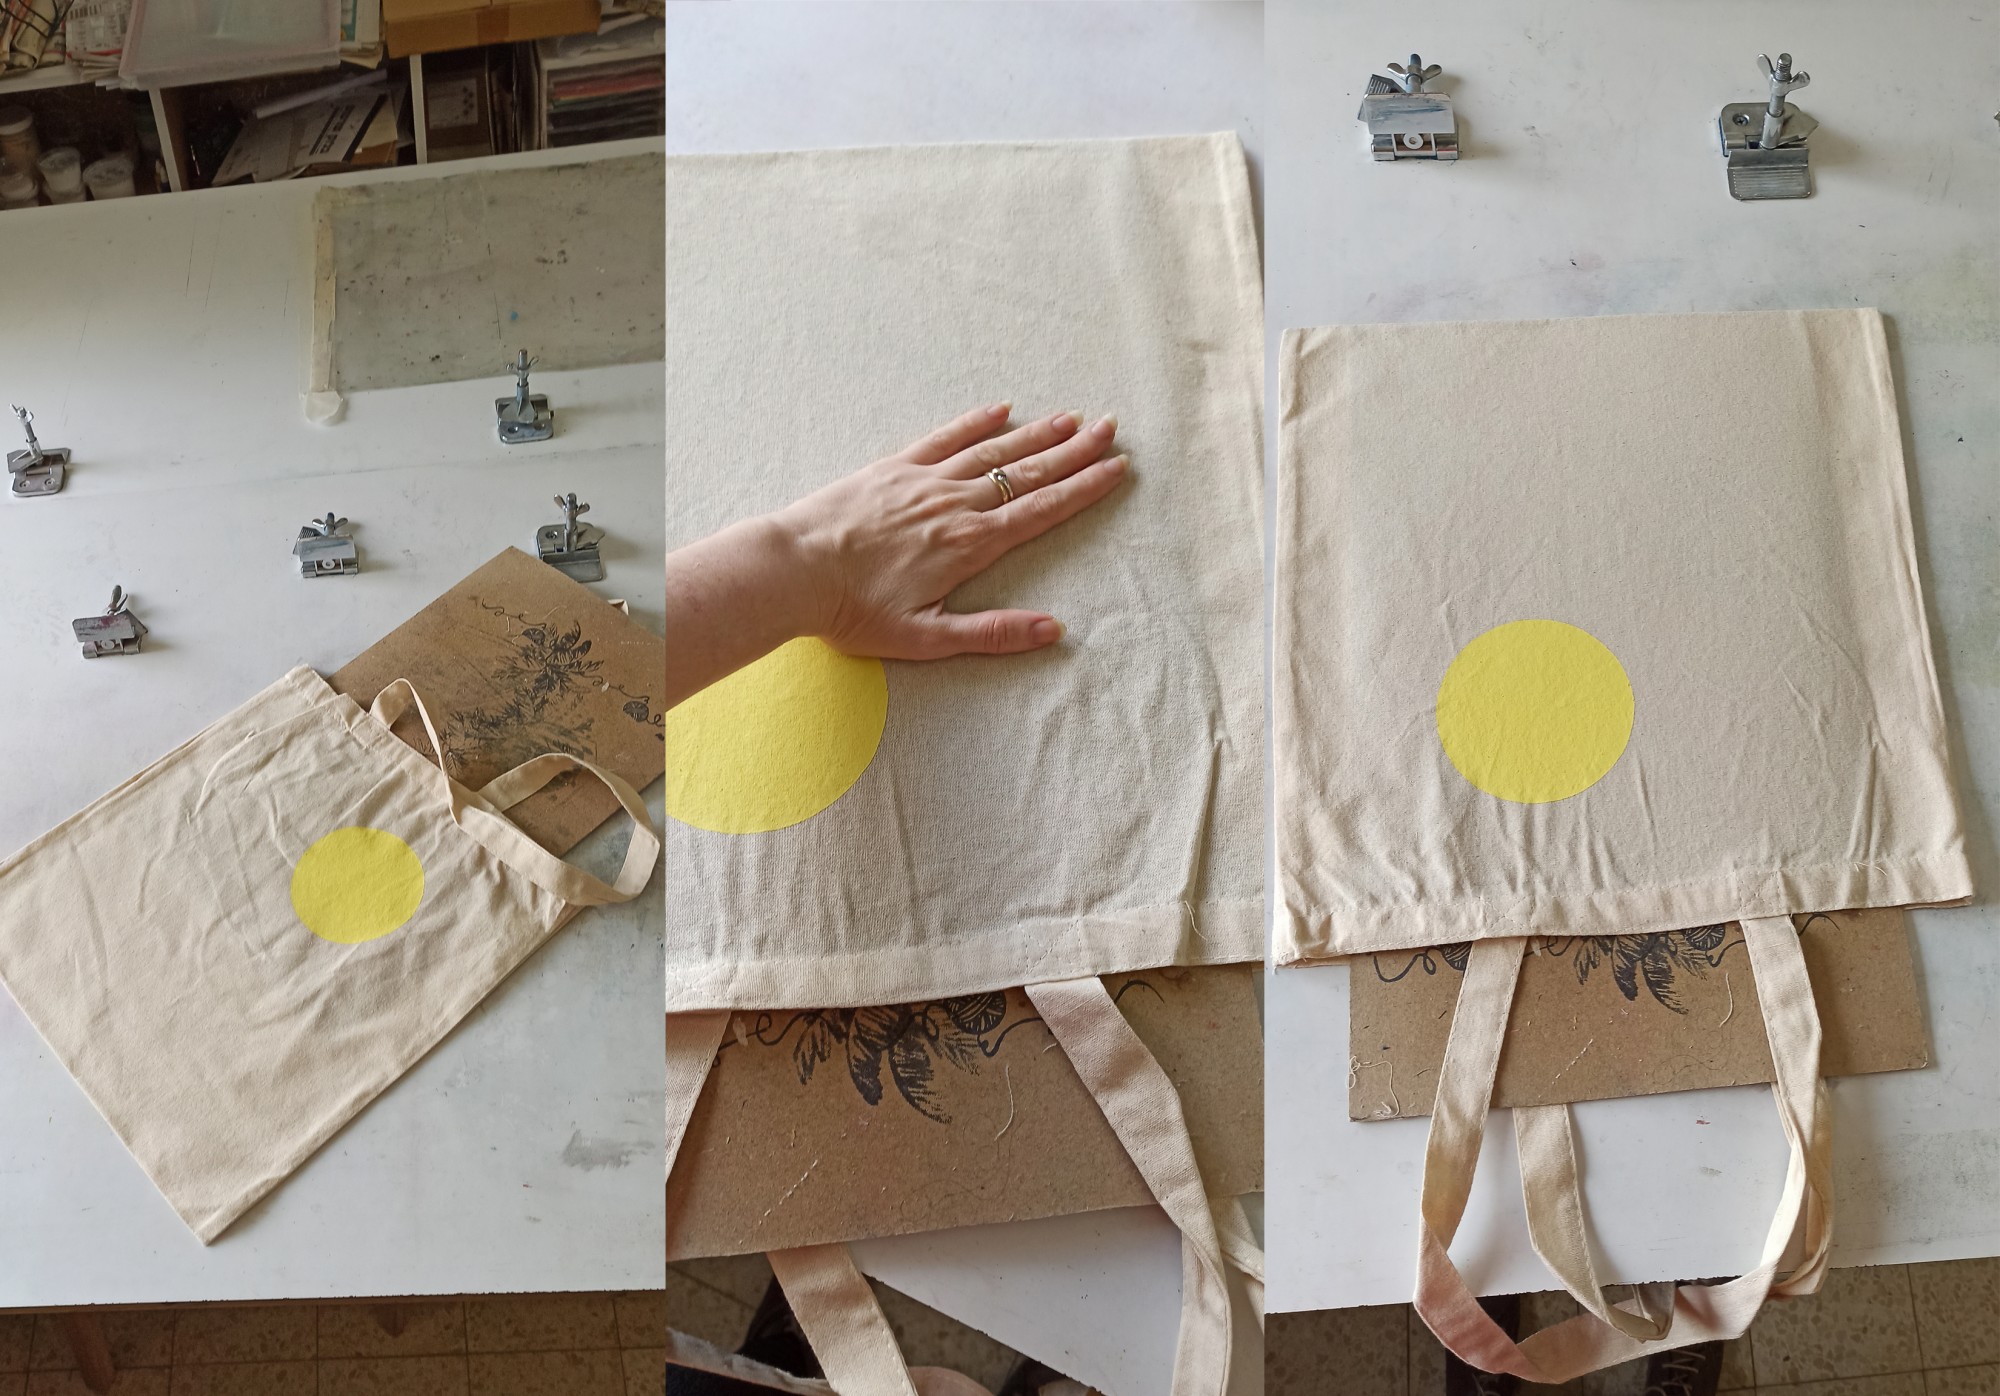
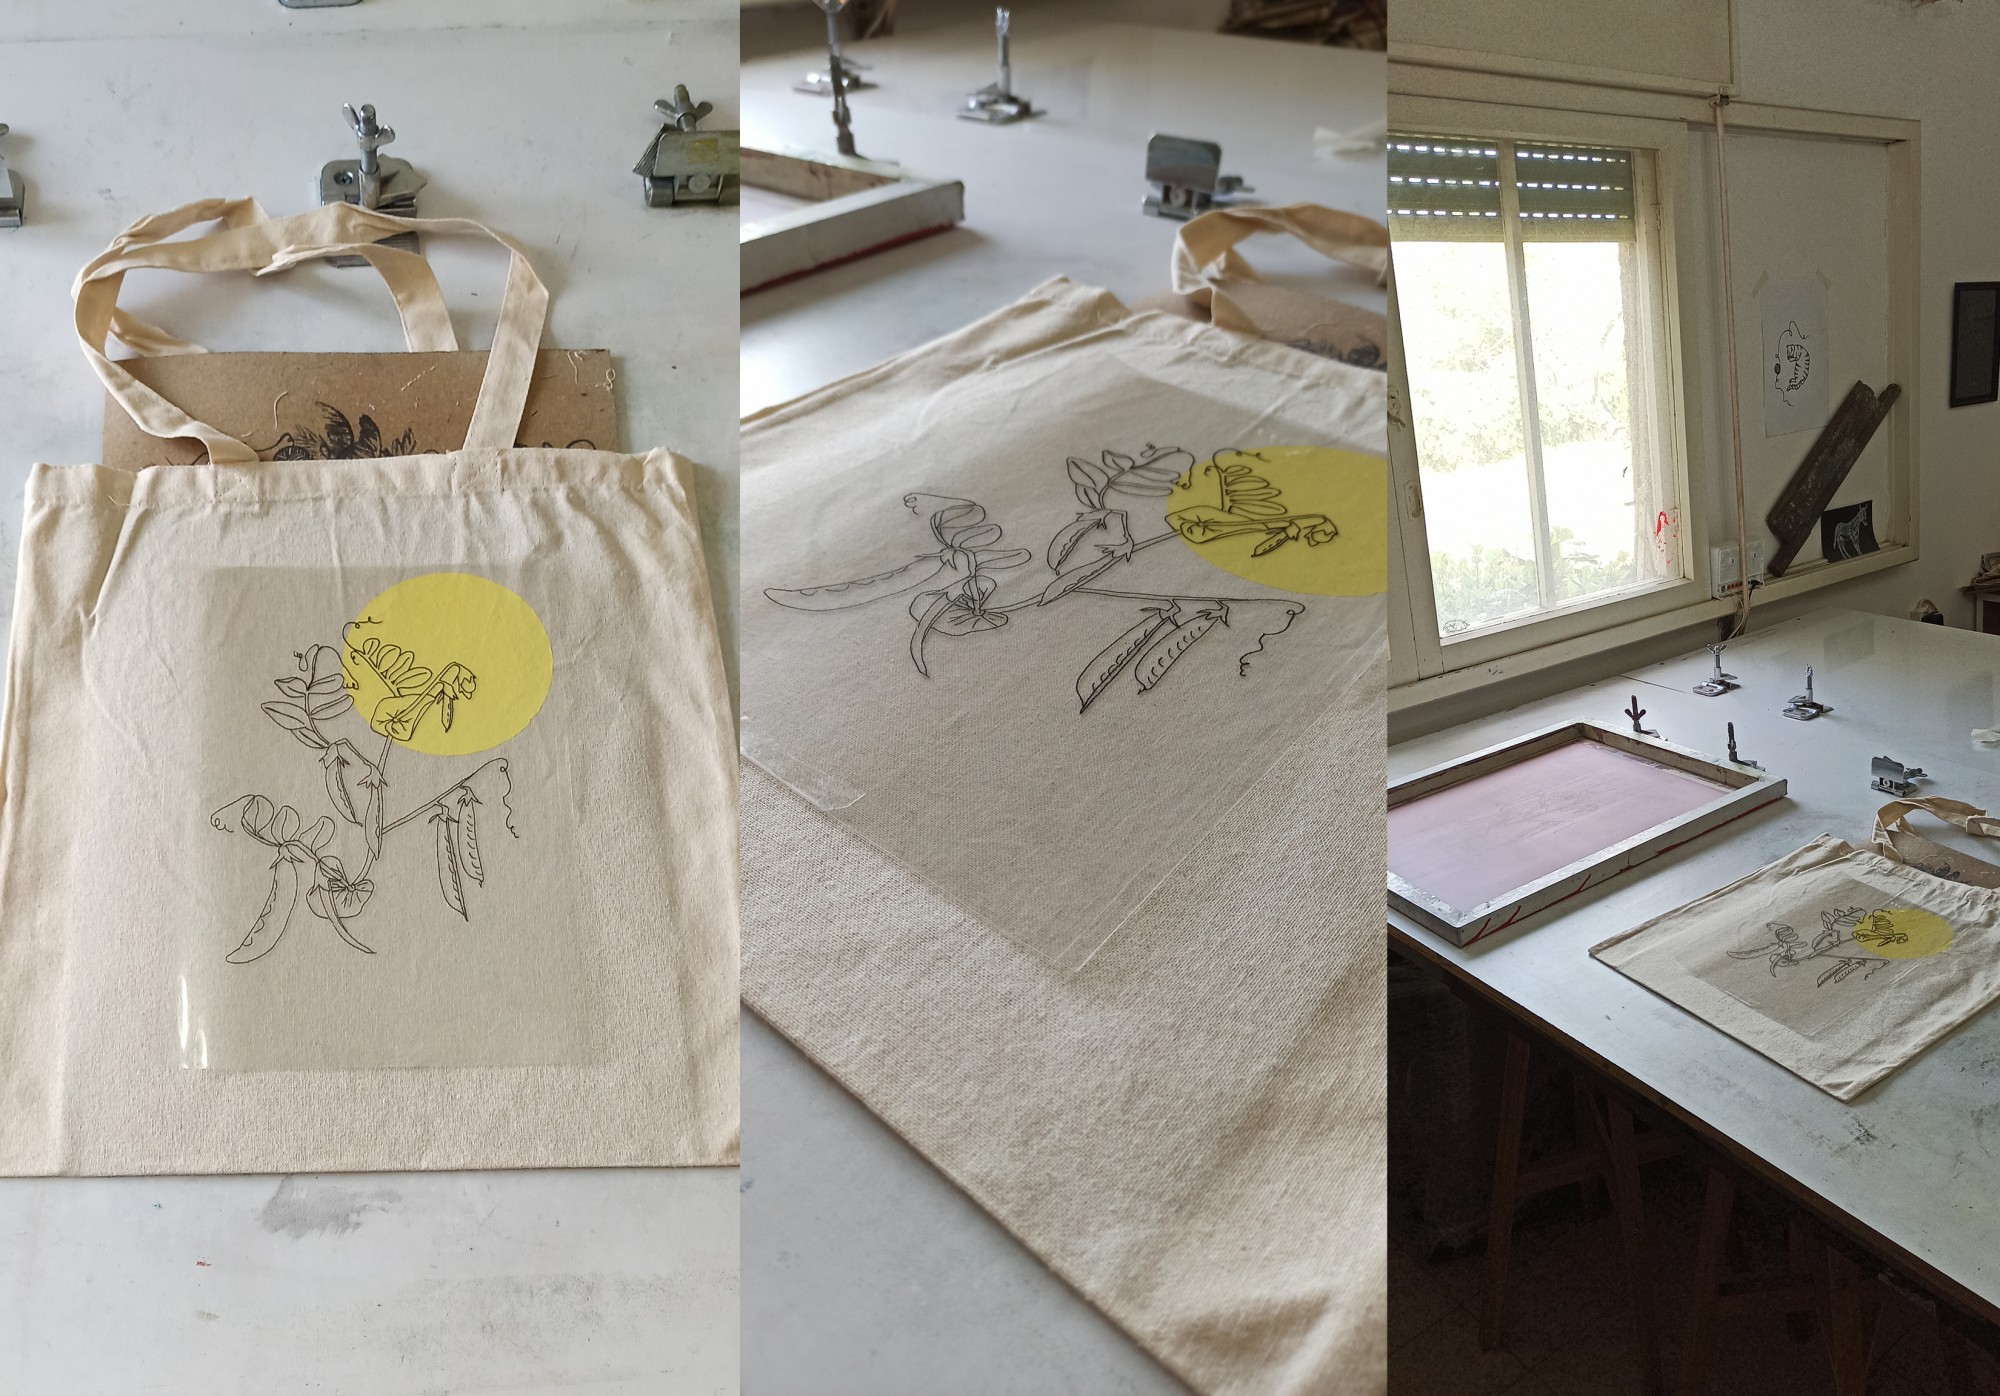
Because this is a second print layer on the same tote bag, and I want to position it accurately in relation to both the bag and the previous print already on it, I’m using the transparency sheet I prepared in Step 4 — the same one used to expose the screen.
I place the transparency on the bag exactly where I want the snow pea illustration to be printed.
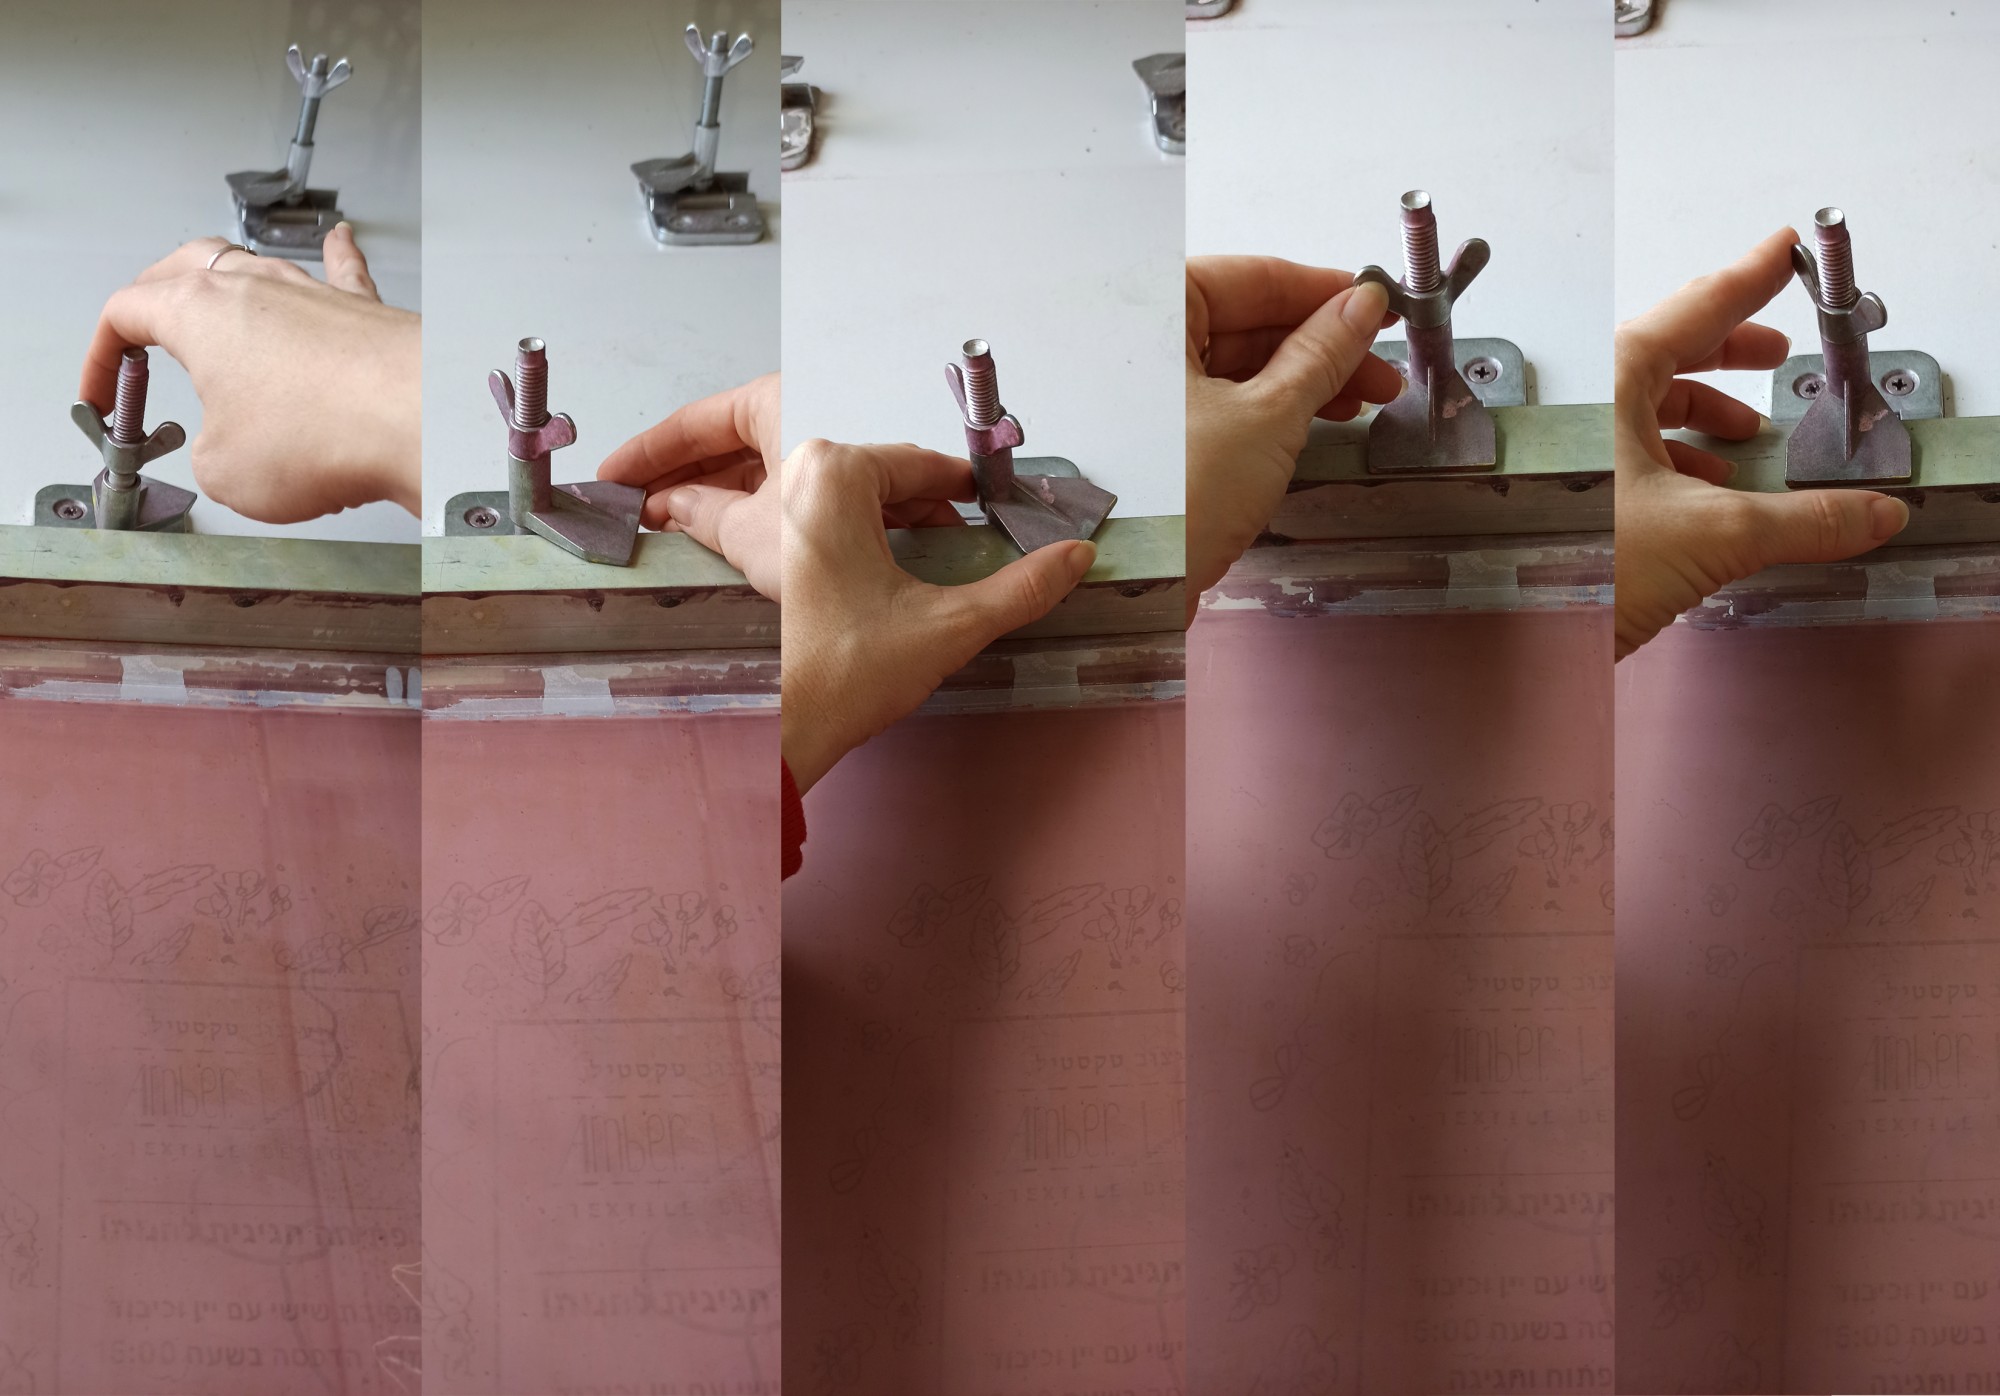
I use screen-printing hinge clamps, which are basically a combination of a clamp and an angle bracket. You can always improvise something similar or buy them from suppliers locally or abroad.
Mine are attached directly to the table I print on, but they can also be mounted onto a wooden board, making them portable and allowing for more convenient printing.
In the photos (from left to right), you can see how the screen is attached to them: by rotating the upper part toward the frame and tightening it with the wing screw, while keeping the flat side of the screen facing the table.
Why are these clamps useful, and why do I recommend them?
When you want to position prints more precisely — especially when creating multi-layer prints with accurate color registration between layers — these clamps are extremely helpful.
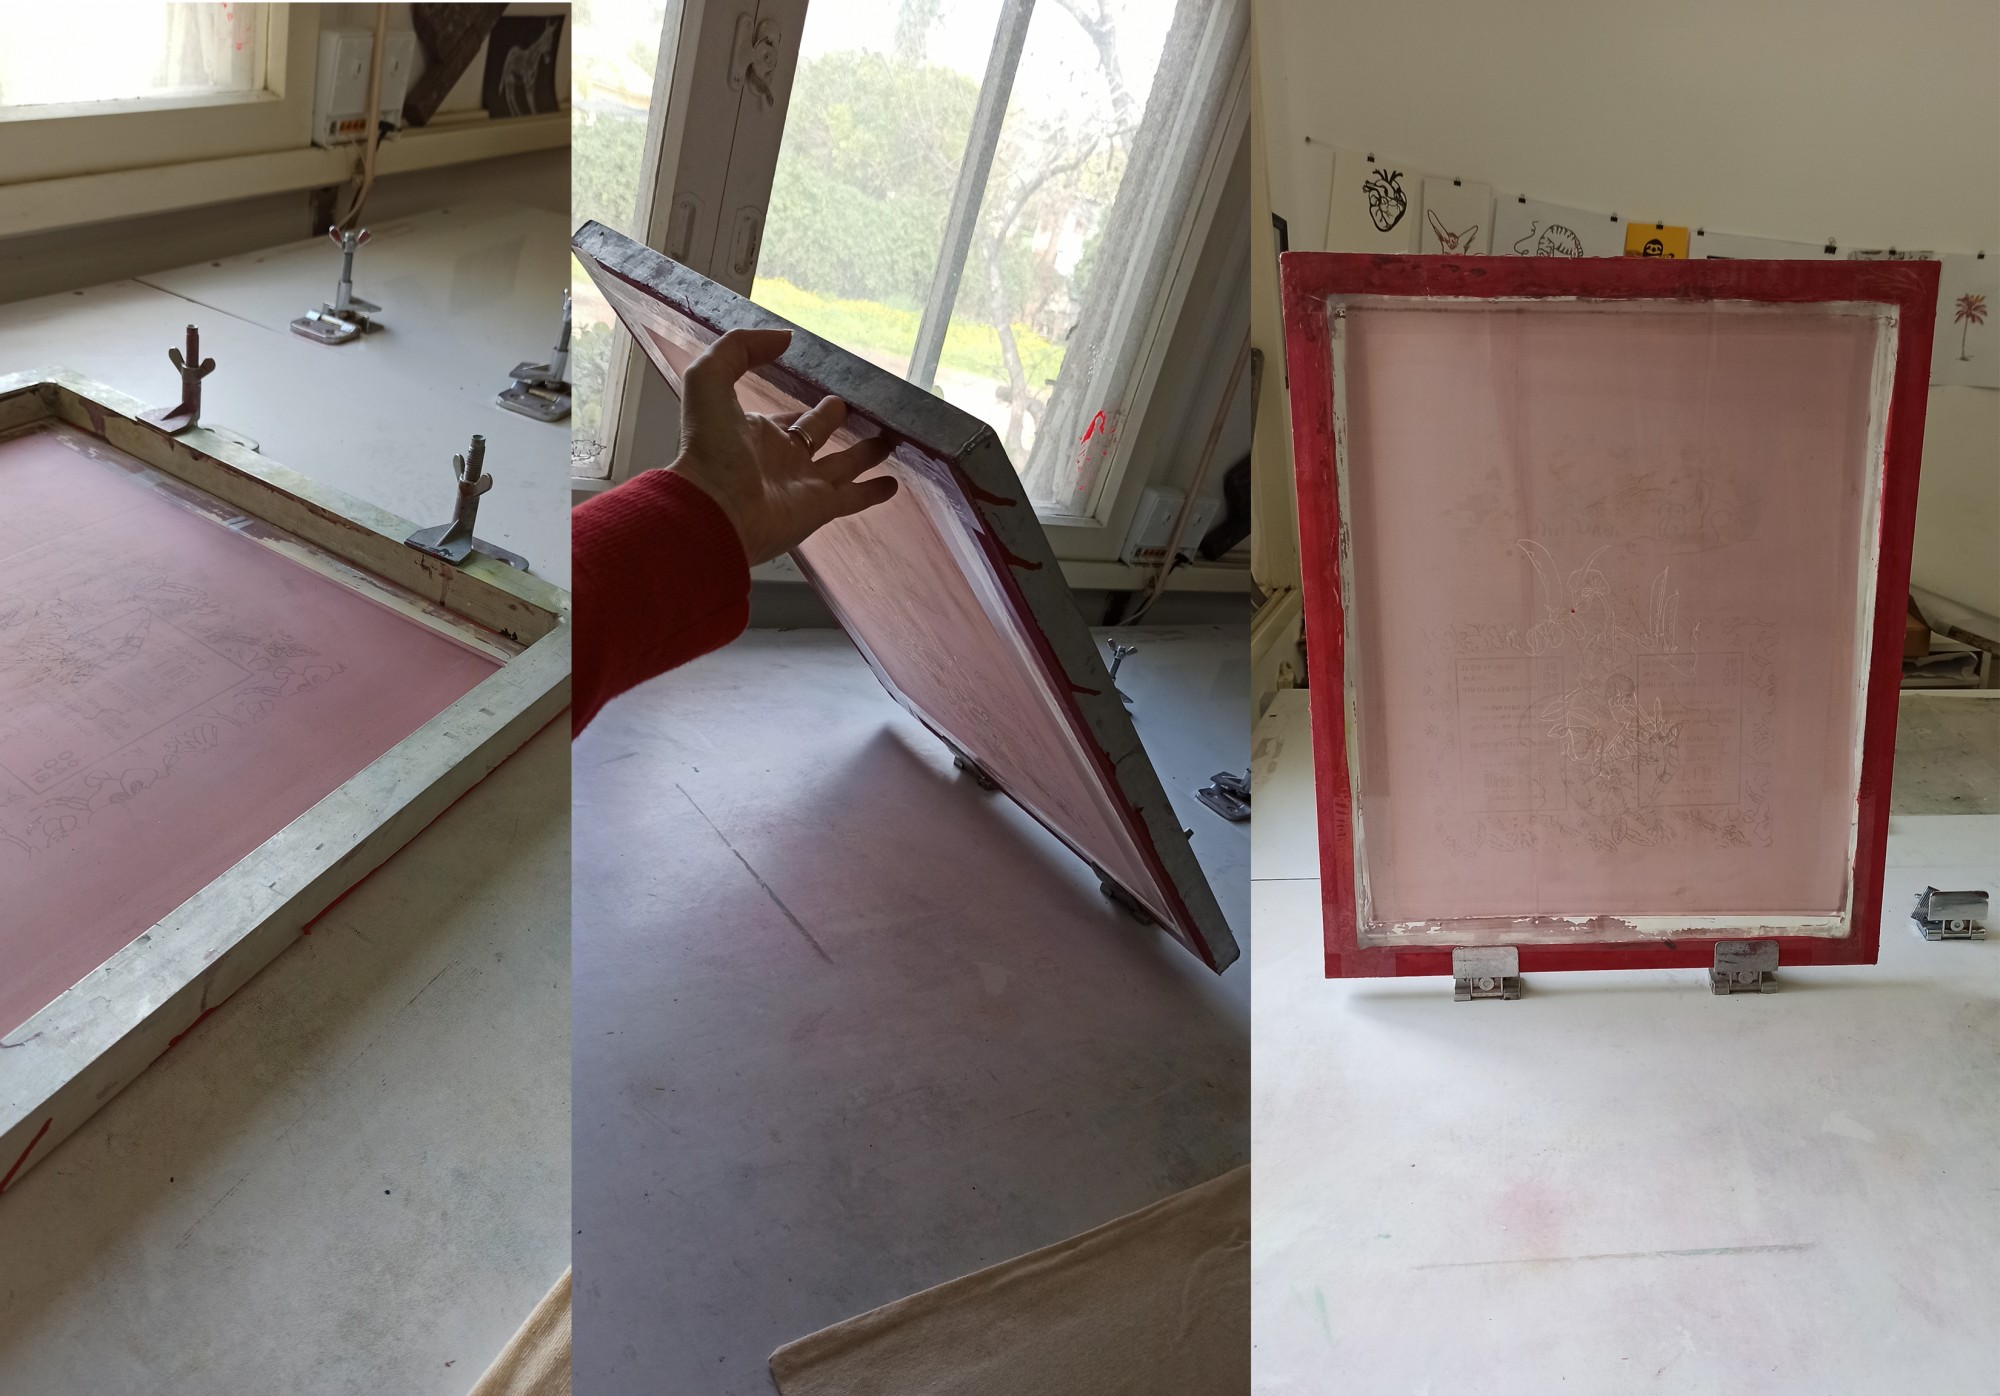
They allow the screen to lift up from the table and stand vertically after printing, while still returning to exactly the same position every time. This means you can print repeatedly in the same spot with consistent alignment.
This is what it looks like:
Now place the screen and the item you’re printing on one over the other. Position the tote bag and the transparency sheet according to the placement of the design on the screen, so everything aligns correctly before printing.
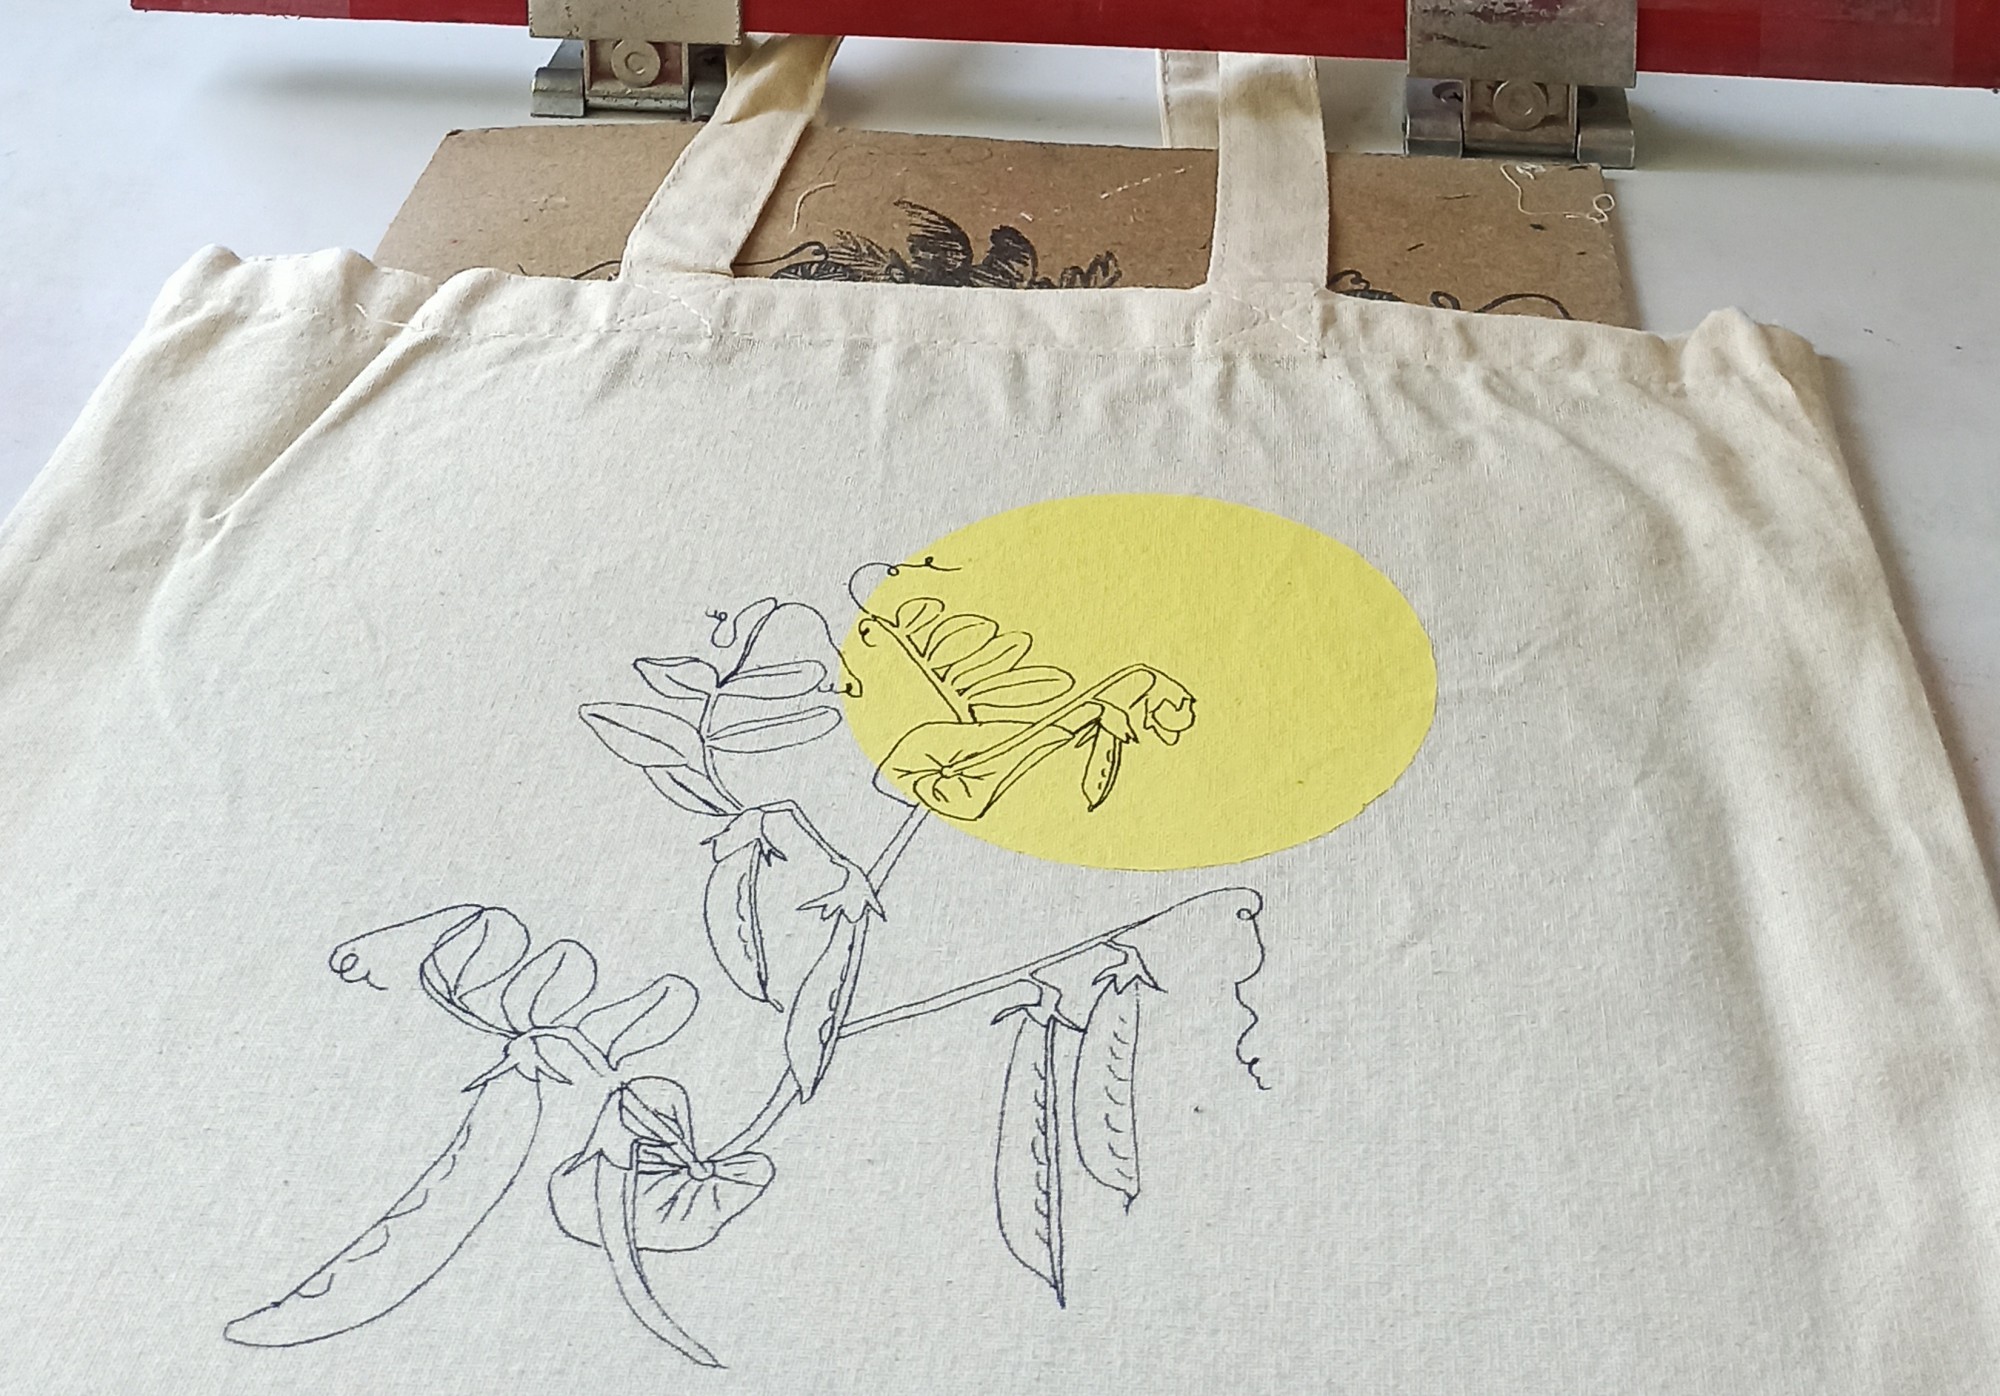
Bring out a printing squeegee and the ink color you’ve chosen. For the delicate snow pea print I’m demonstrating in this post, I’m using black ink so the fine lines remain visible and stand out clearly.
Now that the tote bag is positioned under the screen, without moving the bag at all, lift the screen and remove the transparency sheet, setting it aside. You won’t need it during printing.
Lower the screen back onto the tote bag and move on to the inking stage.
When printing, it’s always best to use more ink than your thrifty instincts might suggest — any excess can be returned to the container afterward.
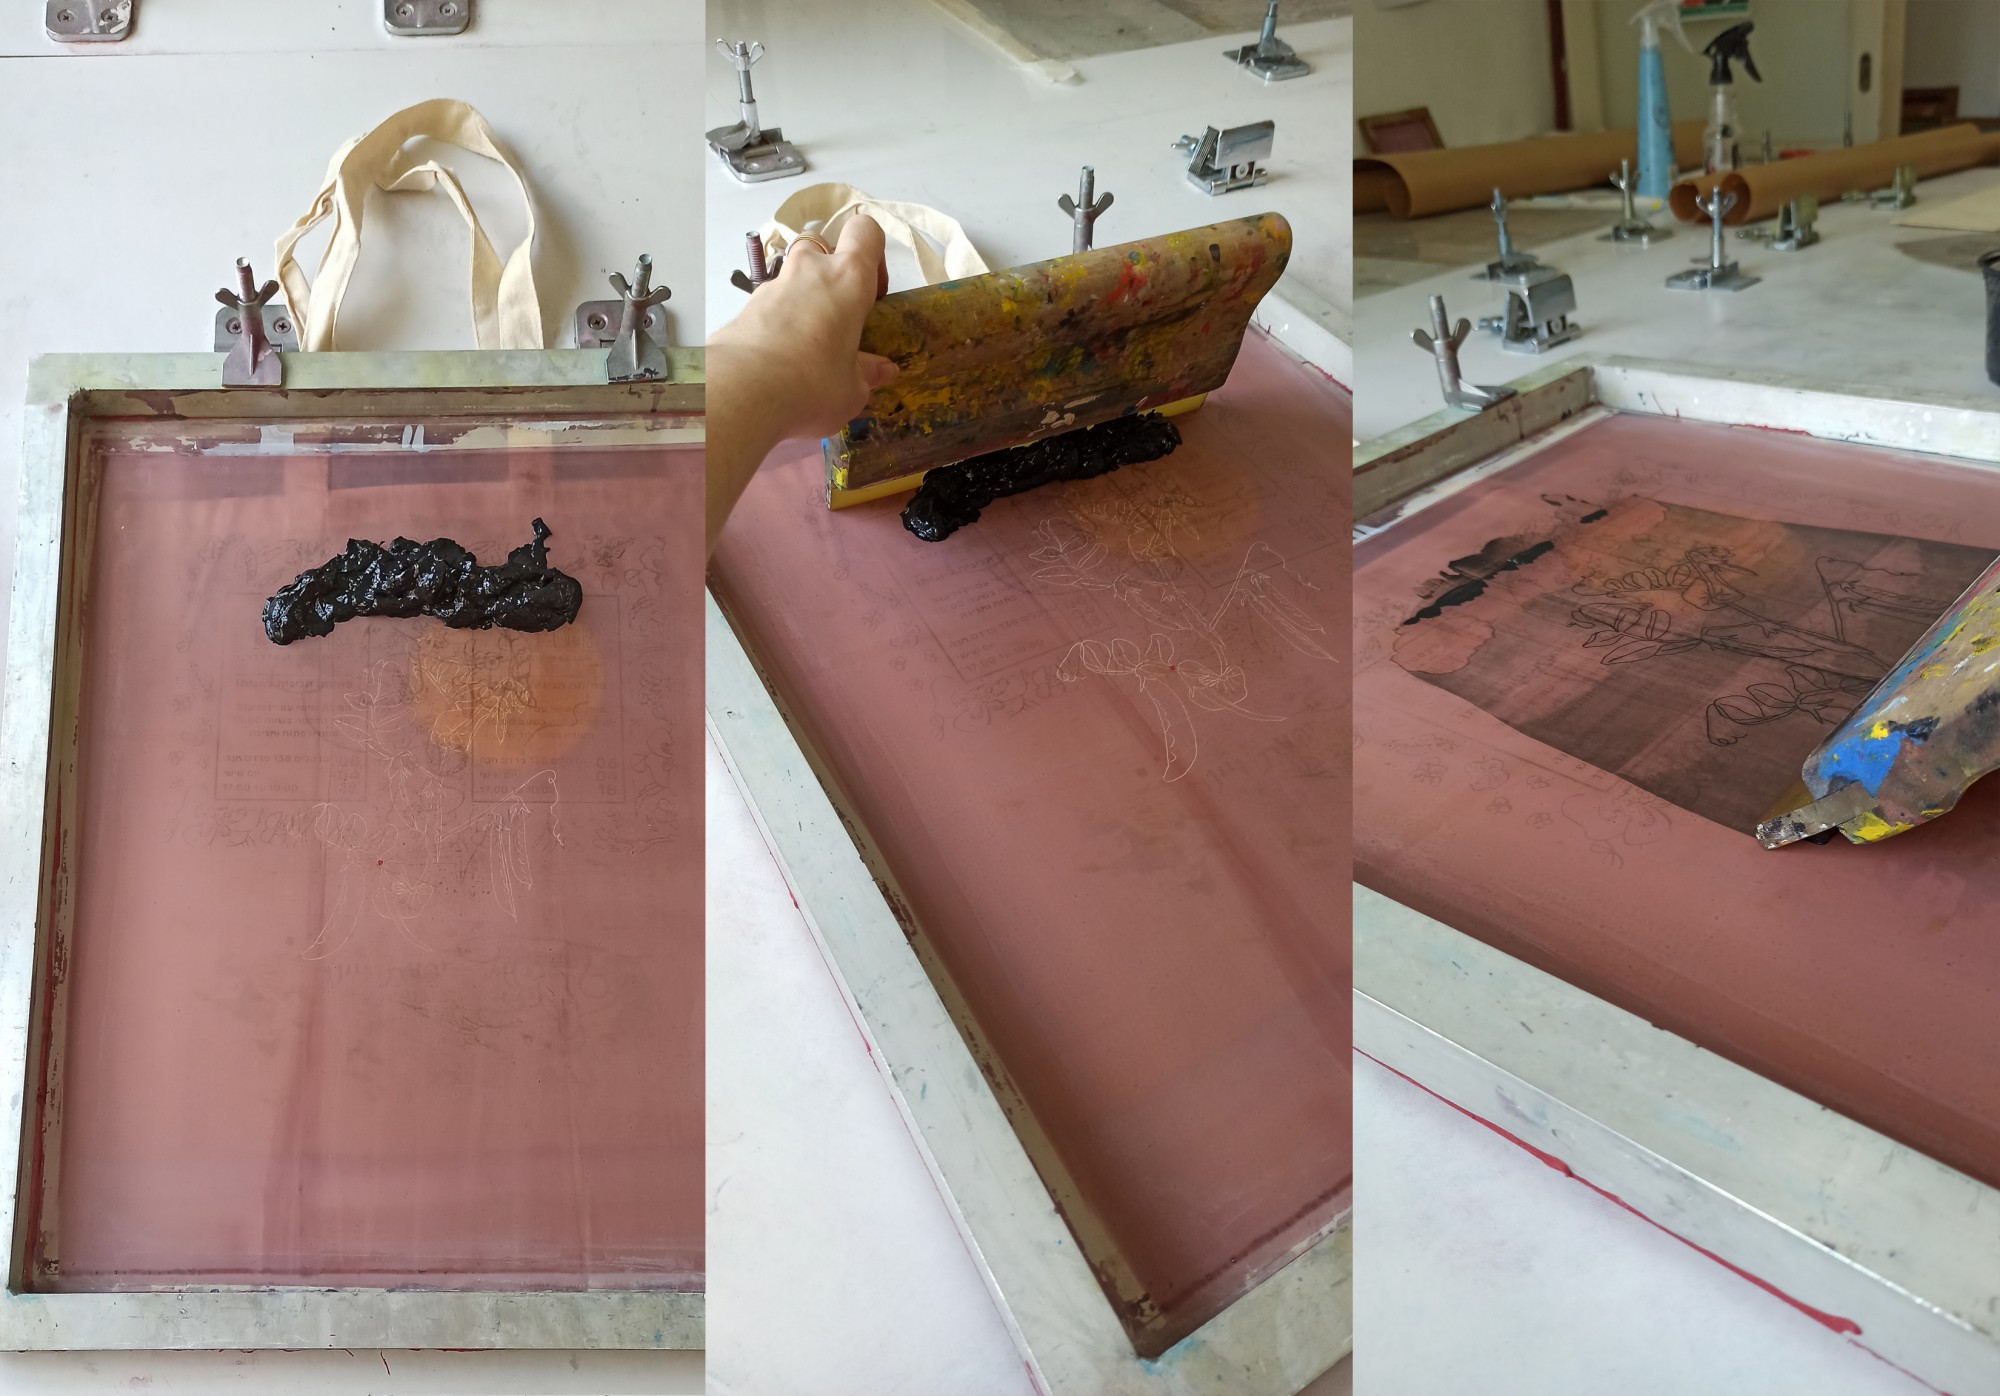
Place the ink above and beside the design, meaning on the part of the screen furthest from you, as shown in the photos. Spread it across the screen so it covers the entire width of the image area.
To print, you’ll need a dedicated screen-printing squeegee. If you have several, choose one that best matches the width of the screen and size of the design. Ideally, the squeegee should be about 2 cm wider than the print area, so you can print comfortably without missing the edges of the design.
Time to print!
Place the squeegee in front of the design and the ink, so it can pick up and pull all the ink across during printing.
Hold the squeegee with both hands — unlike in the photo. I was taking pictures with one hand and printing with the other, but experience makes that easier.
The squeegee should stay at roughly a 45° angle relative to the table/screen throughout the print stroke, and you need to apply firm pressure. In practice, leaning part of your body weight into the movement is often enough.
Then simply pull the squeegee across the screen with:
the correct angle,
even pressure,
one continuous movement.
Start about 5 cm before the design and finish about 5 cm after it, so the whole image receives an even layer of ink.
How do you know if you printed correctly?
1. Check the ink on the screen
As shown in the photo, there should be a very thin, even layer of ink left on the mesh around the design. That means you applied enough pressure and maintained it throughout the pull, allowing ink to pass through the screen onto the fabric (or other material).
2. Lift the screen and inspect the print
Because the screen is attached with hinge clamps, it returns to exactly the same position each time. This means you can lift it carefully and check the result — as long as the material underneath doesn’t move.
This is difficult with small sheets of paper because paper often sticks to the screen. But when printing on fabric, shirts, or tote bags, part of the material usually extends beyond the screen frame. You can hold that exposed fabric with one hand while slowly lifting the screen with the other, separating the fabric from the ink without shifting it.
Then you can peek and decide:
Does it need another print stroke?
Or is it finished?
Final step for fabric printing
If you printed on fabric, heat-set the ink afterward by ironing at 150°C (300°F) for 1–2 minutes to fix the print permanently.
After all the work and anticipation, here’s the final result:
Of course, there’s no need to stop here — you can keep printing with this screen over and over again, on different materials and in different colors.
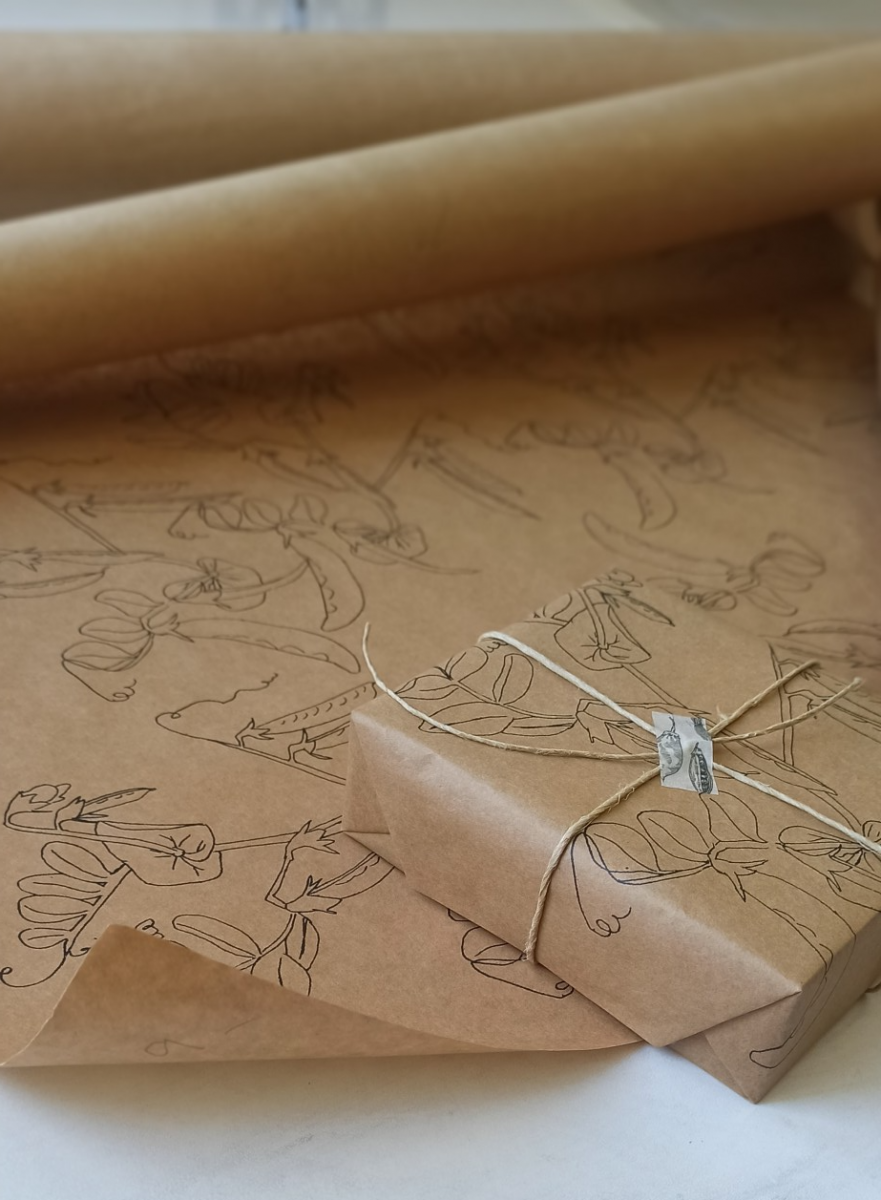
After printing the tote bag, I liked the result so much that I didn’t want to stop, so I continued printing on a piece of brown wrapping paper I had lying around.
Looks good, doesn’t it?
I hope this tutorial helped and gave you the confidence to start creating.
You’re always welcome to reach out to me on WhatsApp or send me a direct message on Instagram if you’d like advice or have questions.
For those who’d prefer to learn in the studio, there’s a variety of workshops available for different levels and needs — including beginner workshops and advanced workshops.
For questions about the workshops, feel free to get in touch in whichever way is most convenient for you.